This post shows how to solve the puzzles in room 6 in order to get a Broken Plate piece needed for the Astronomical Clock. First, you need to have gotten the key to the room from the Clerk’s Office downstairs. If you just want the answer, use her journal to get the Pisces, Libra, and Taurus symbols.
Solve the Picture Order & Get Their Numbers
The first thing you need to do is change the pictures on the wall so that the rot line connects from left to right.
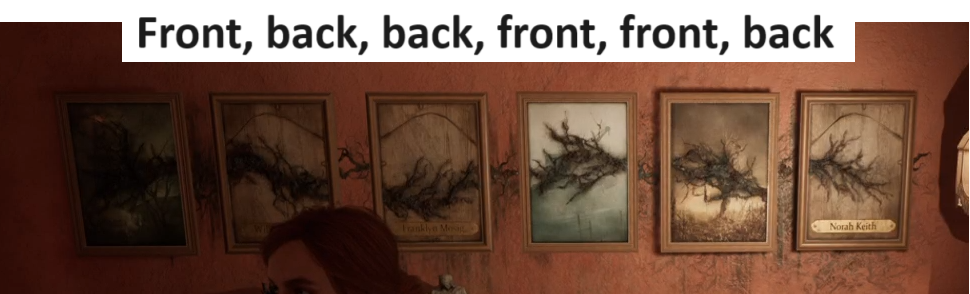
Once that’s done, you’ll see that three names are now visible.
William, Franklyn, and Norah.
Get the Related Numbers
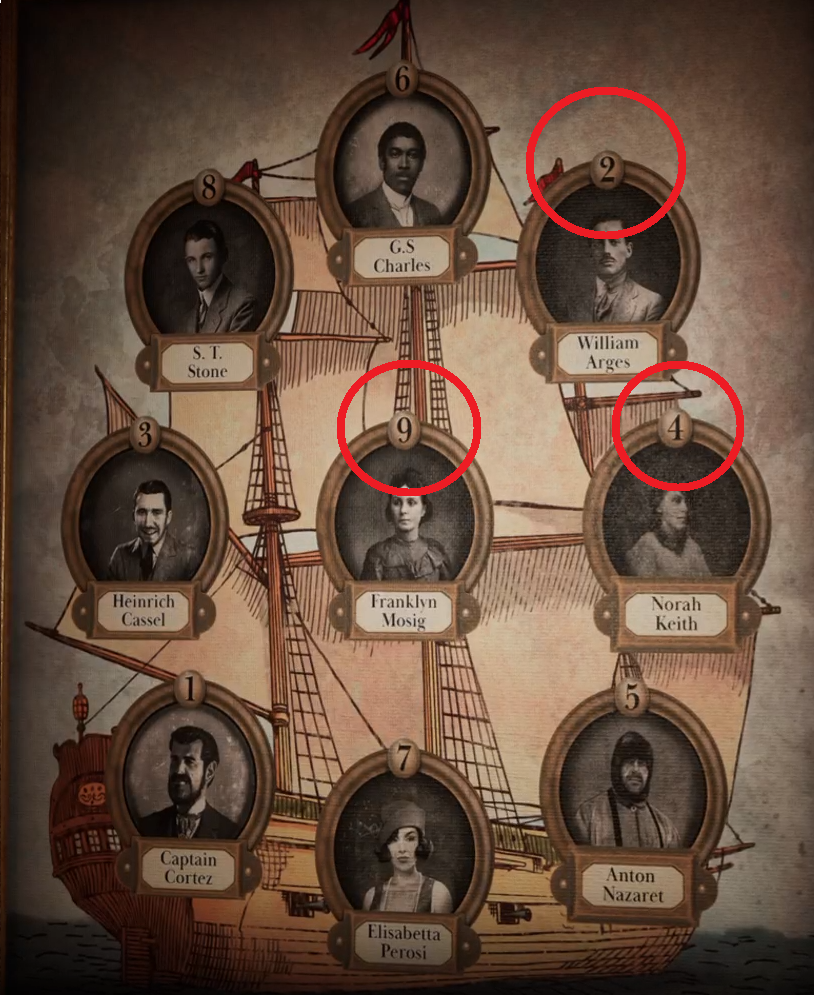
Now, go get their numbers off the other painting on the wall.
Once that’s done, you’ll see that three names are now visible.
William – 2
Franklyn – 9
Norah – 4
Use the Journal to get the Symbols
Now we need Elisabetta’s Journal which is on the love seat in the back. We’ll use her zodiac picture to translate the numbers into symbols for the lock. When you first pick it up, you’ll see really faint 1, 10, and 11 written on it. We’ll infer the other numbers from that.
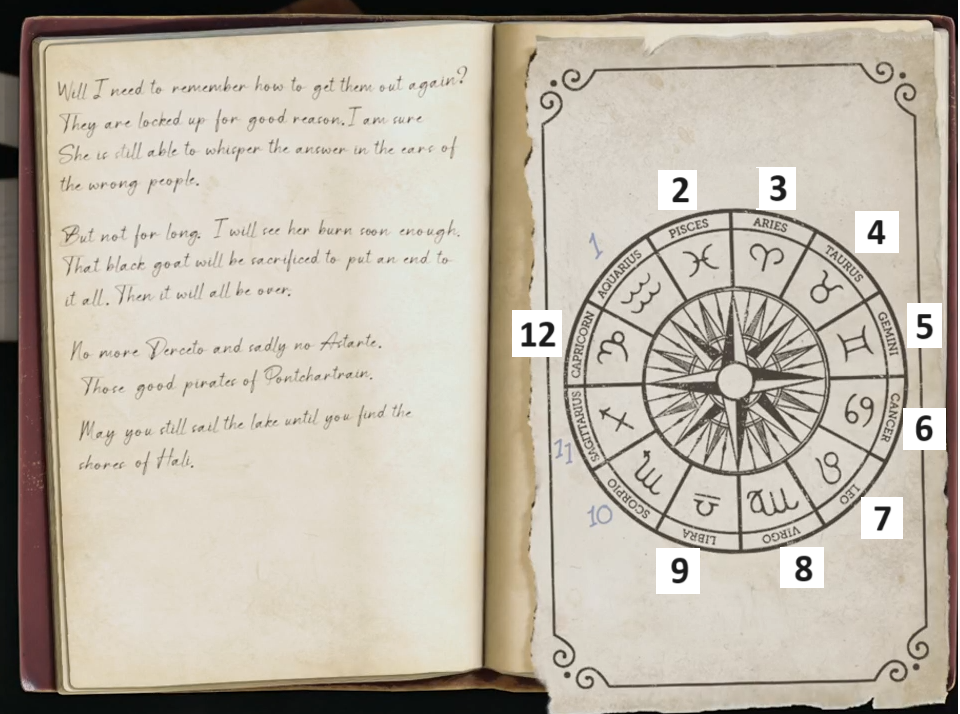
Now we have:
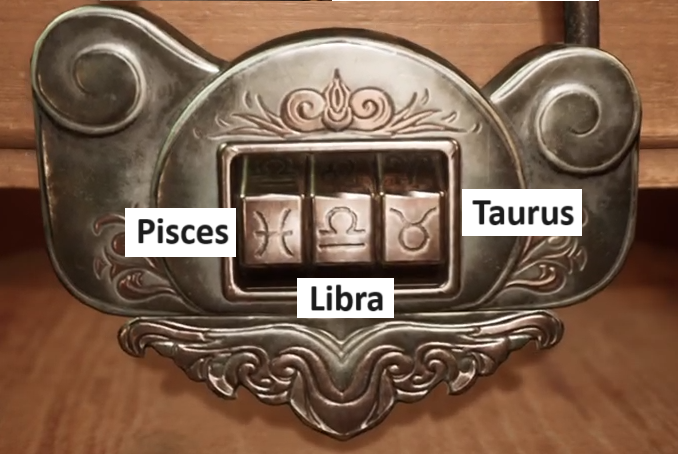
William – 2 – Pisces
Franklyn – 9 – Libra
Norah – 4 – Taurus
Now we can open the lock.