This post is just two maps of the camp locations for the Wasteland and the Great Desert.
All camp locations are listed out in the google workbook and can be found here: All Camp Locations
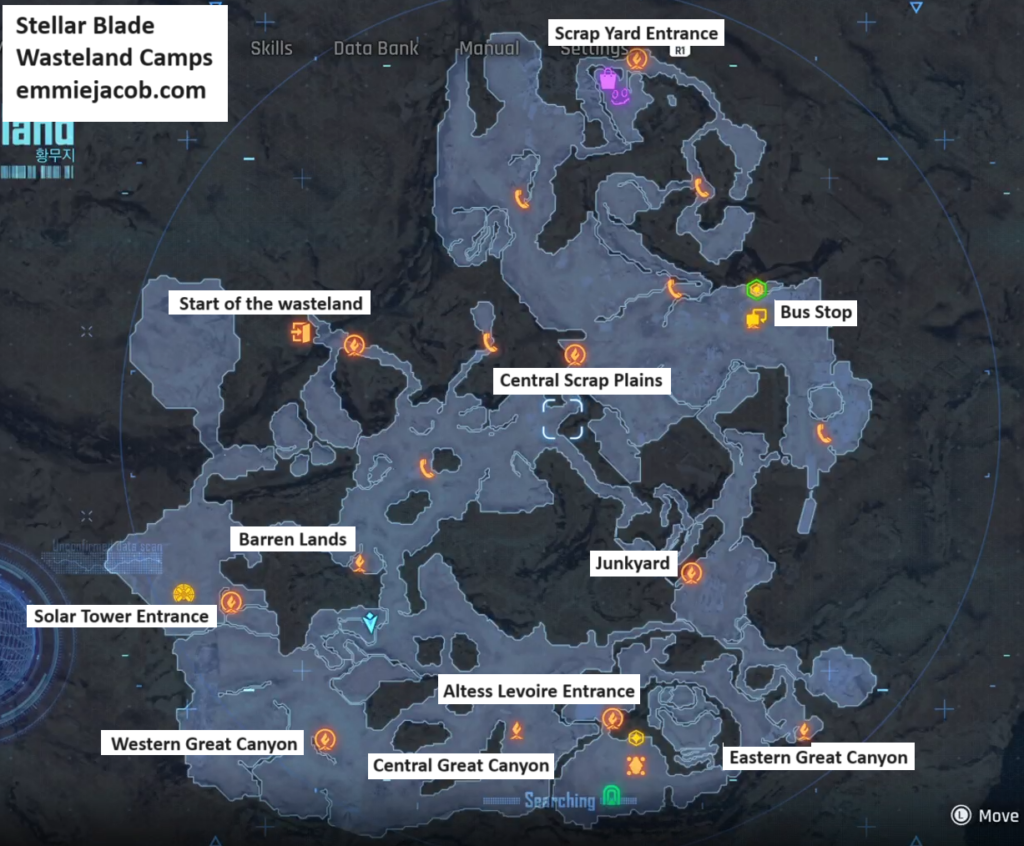
Wasteland Supply and Legion Camp Locations Map
There are 11 camps in the Wasteland. While technically there is a 12th, you can’t get it until late game, and it’s not really missable so I’ve left it off the map. But it’s in the Google Workbook if you want to know about.
Great Desert Supply and Legion Camp Locations Map
There are 19 camps found in the Great Desert.