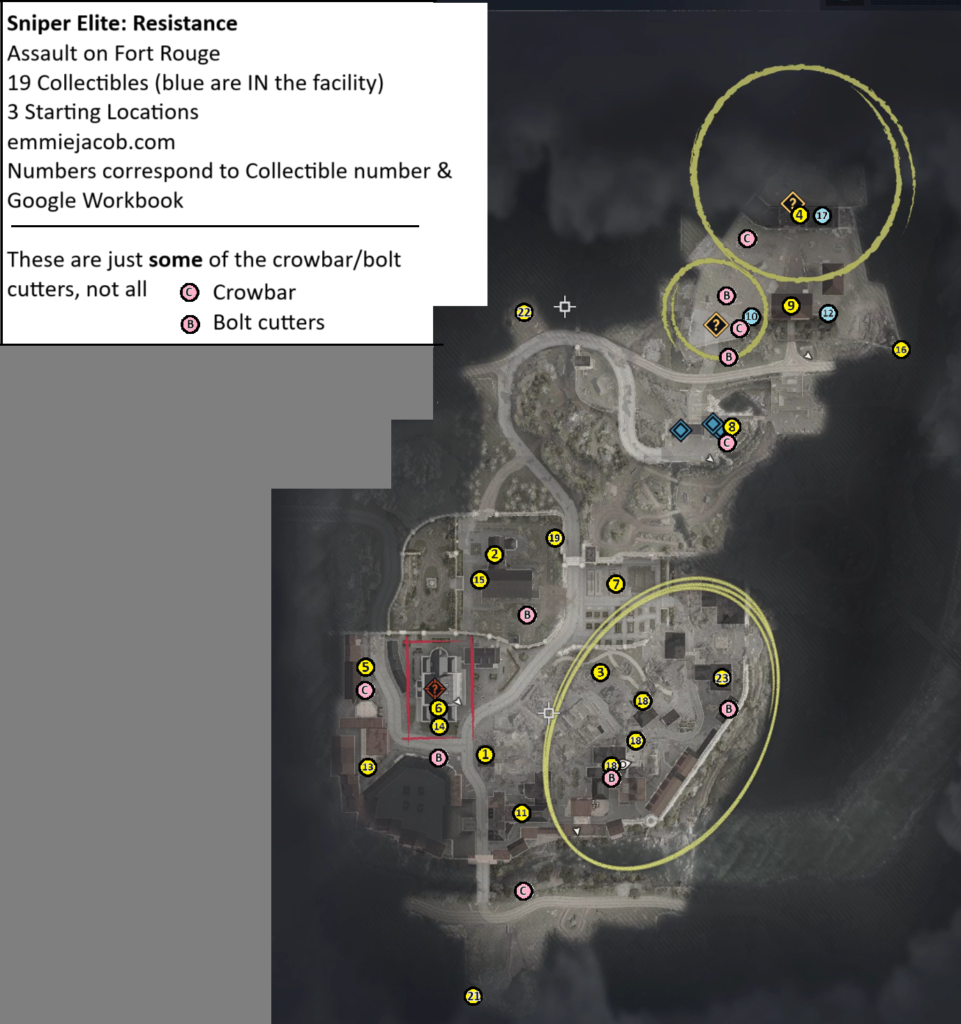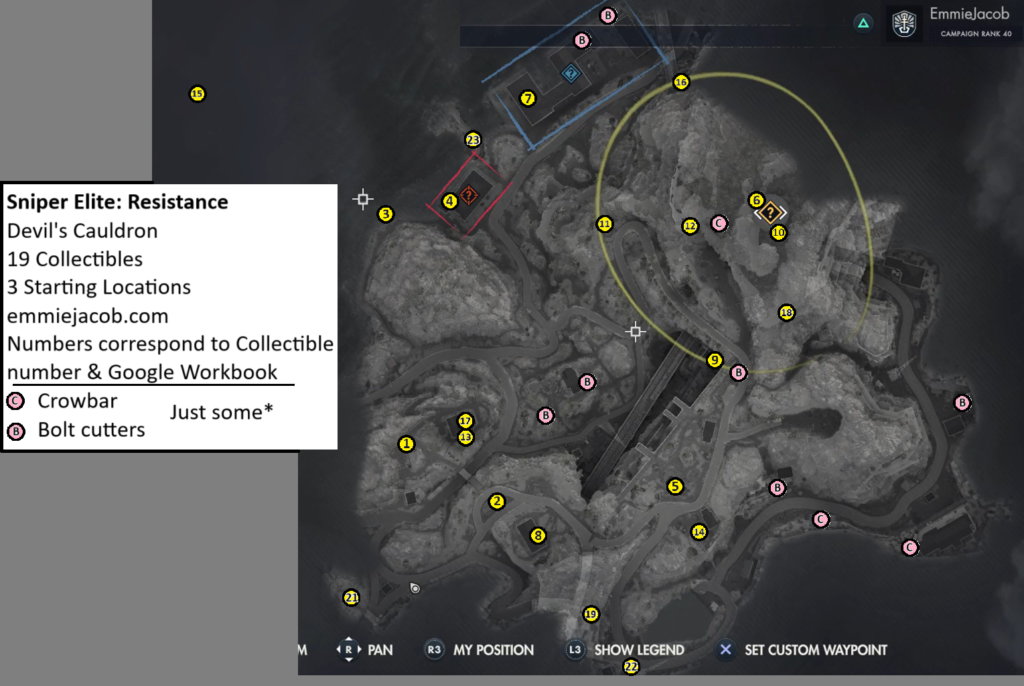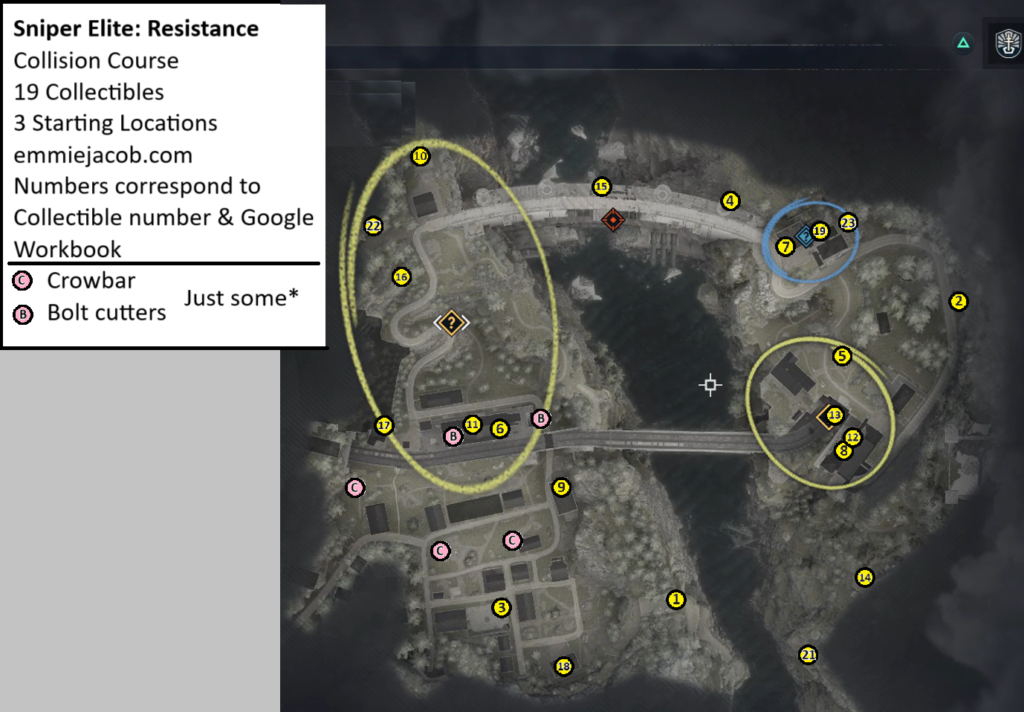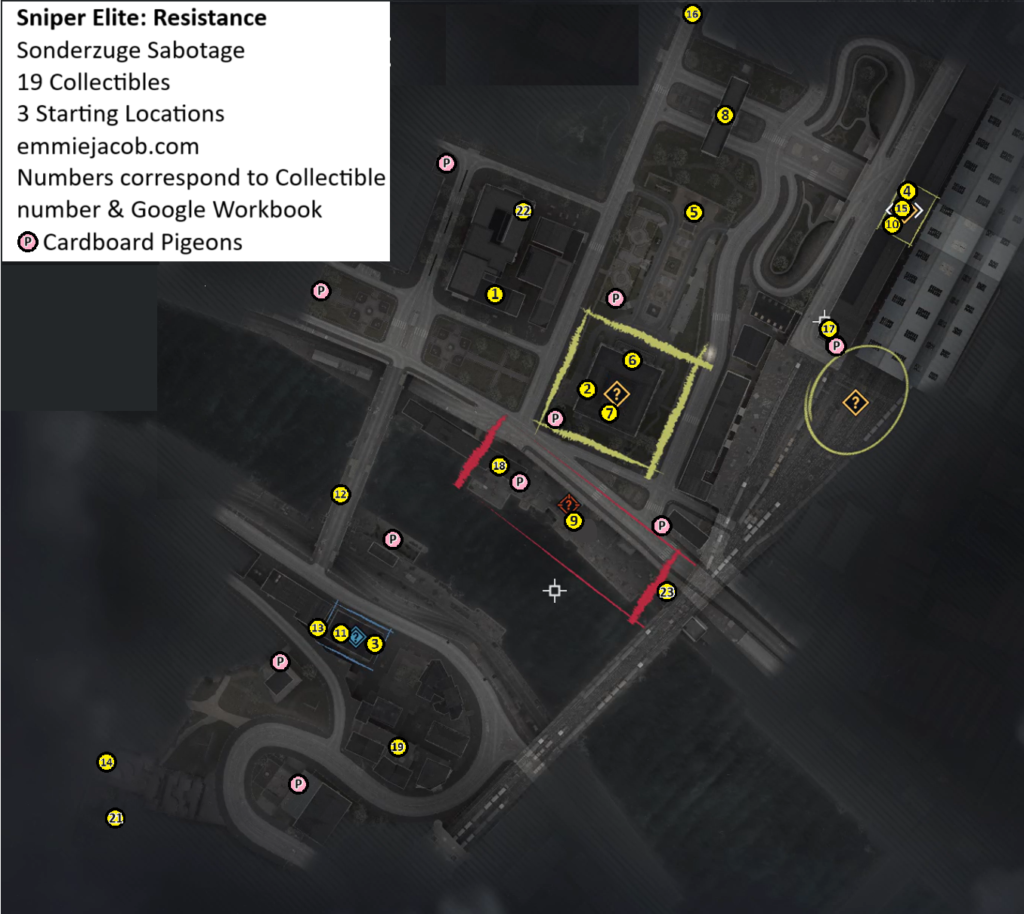
This map includes Collectibles that match the numbering in the game, along with all 3 infiltration points (21 – default South Mountain Path, 22 – Checkpoint Cabin, and 23 – Breached Wall). The pink circles are C for crowbar and B for bolt cutters.
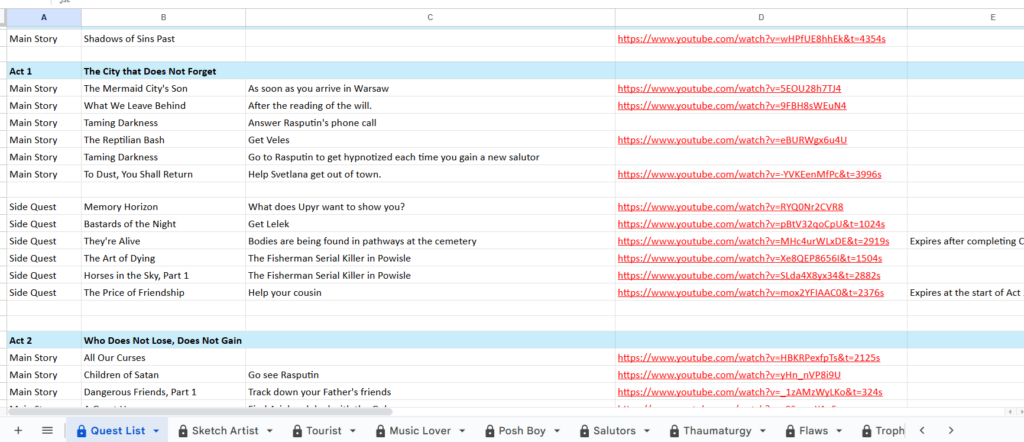
More contextual information regarding the collectible location can be found in the google workbook here along with a full video walkthrough link.
The crowbars and bolt cutters aren’t all, they’re just some of the ones I found.