RE4R DLC: Separate Ways All Puzzles/Requests

Blue Medallions #1 – Chapter 2, worth 6 spinels
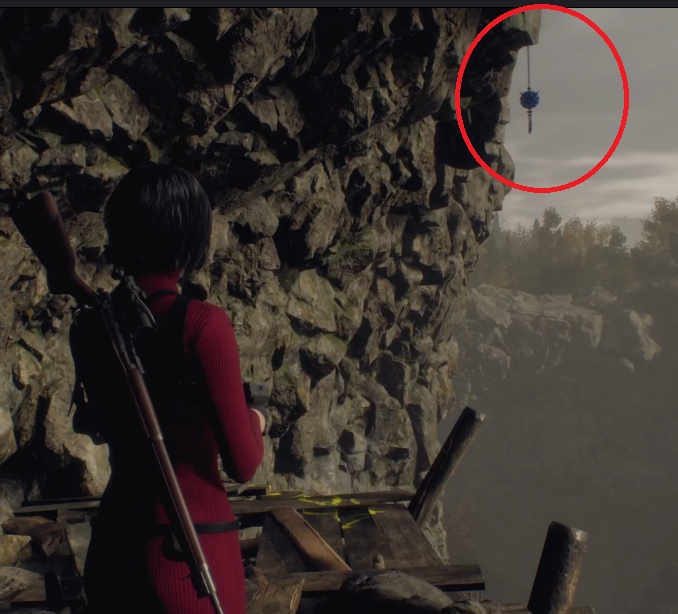
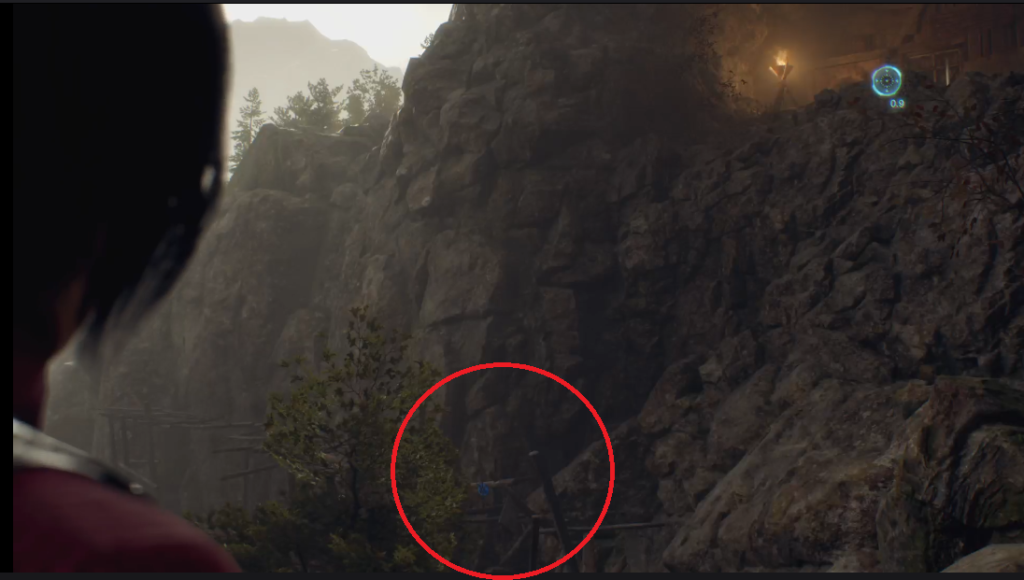
Cliffside Puzzle Door – Chapter 2
Jacket of All Trades – Chapter 3, worth 7 spinels
Bindery Puzzles – door and shield
Blue Medallions #2 – Chapter 4, worth 7 spinels
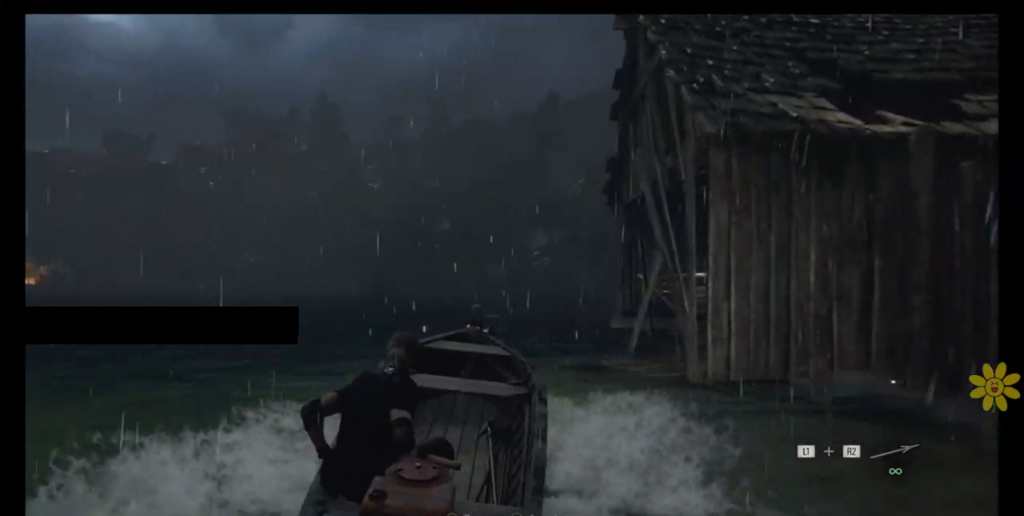
Lord of the Waterways – Chapter 5, worth 8 spinels
Bug Busters – worth 8 Chapter 5, spinels
Beautiful Beetles – Chapter 6, worth 10 spinels
Bug Busters #2 – Chapter 6, worth 9 spinels
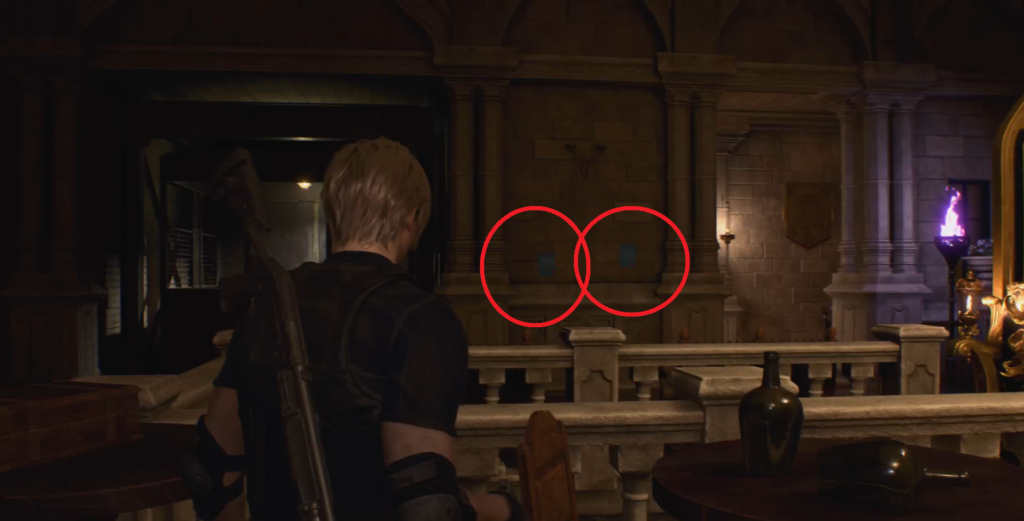
Blue Medallions #1

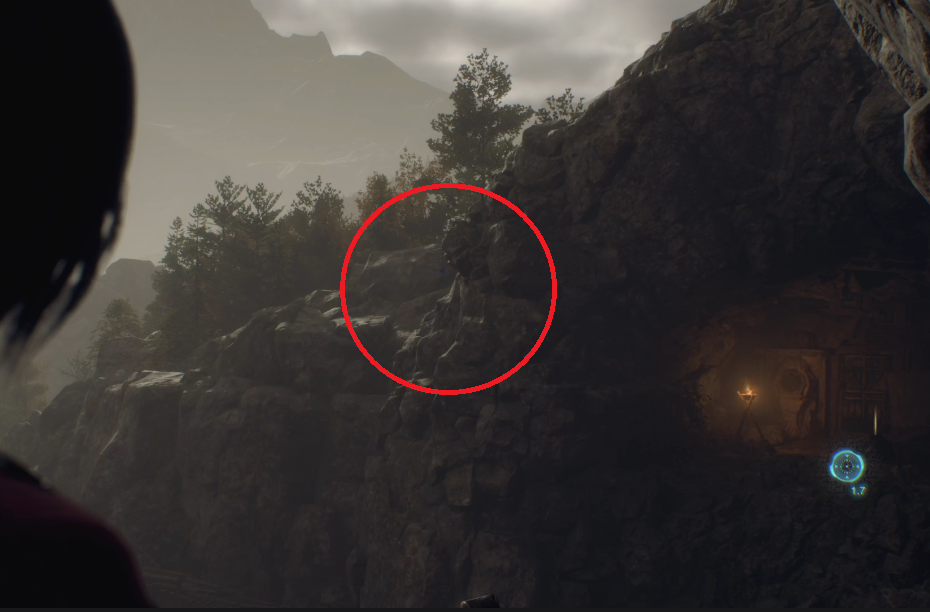
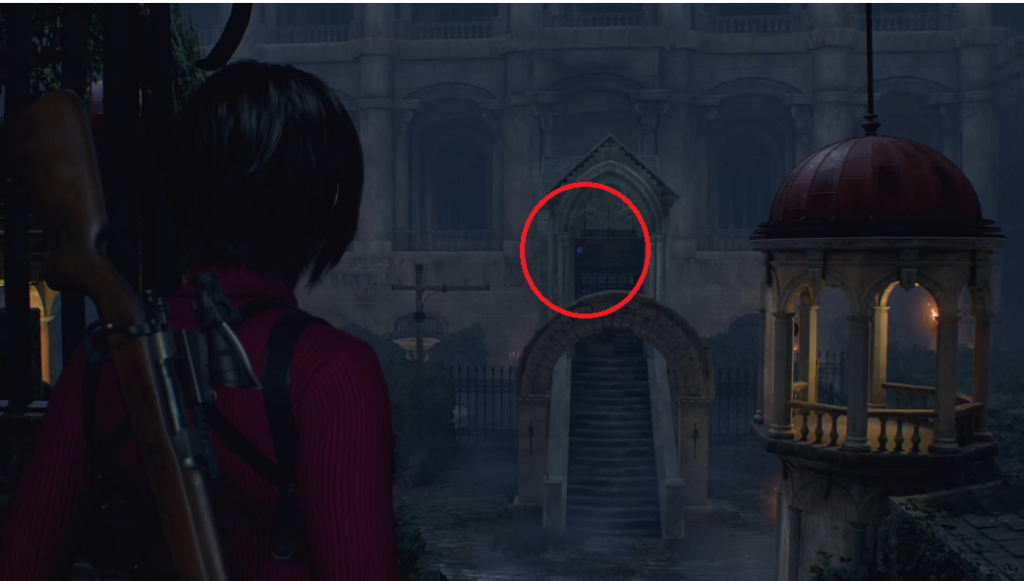
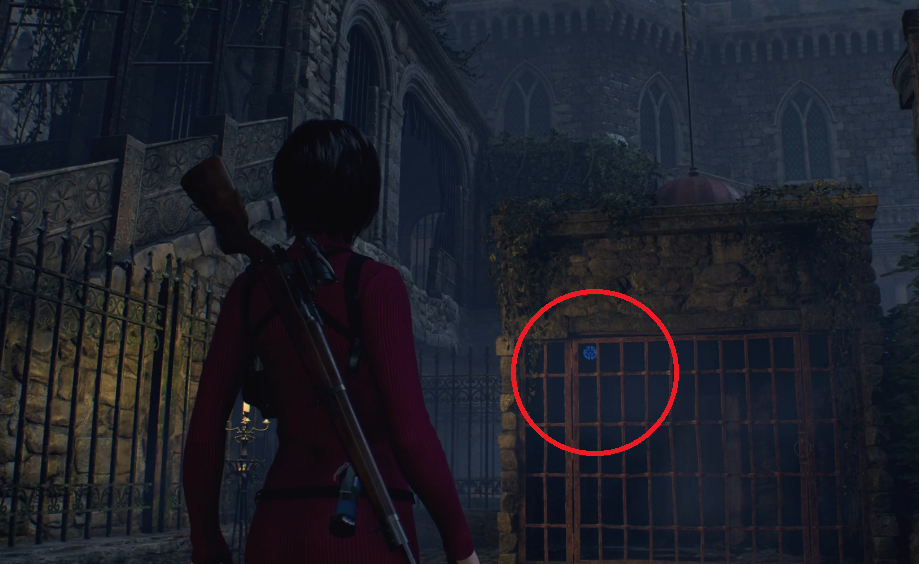
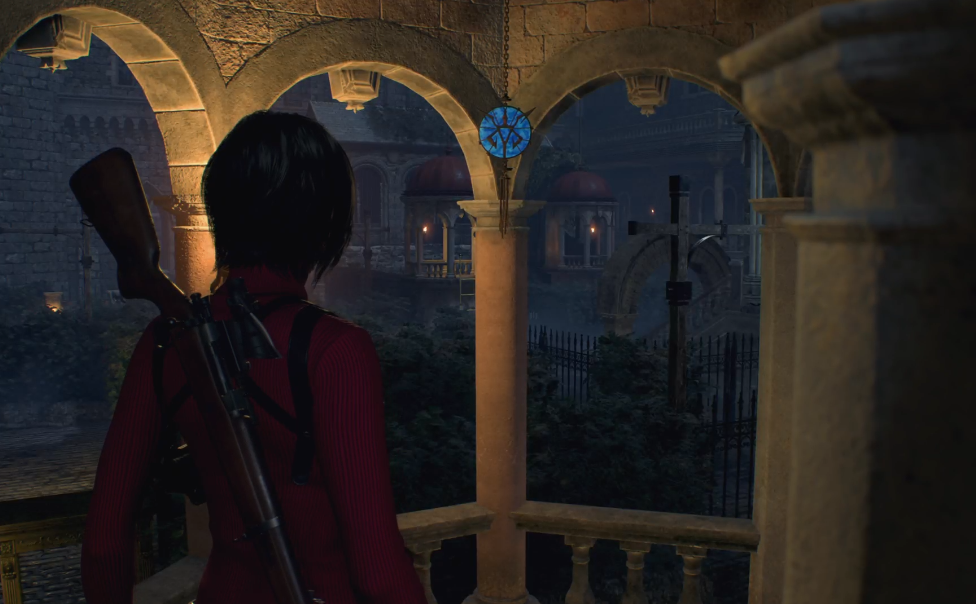
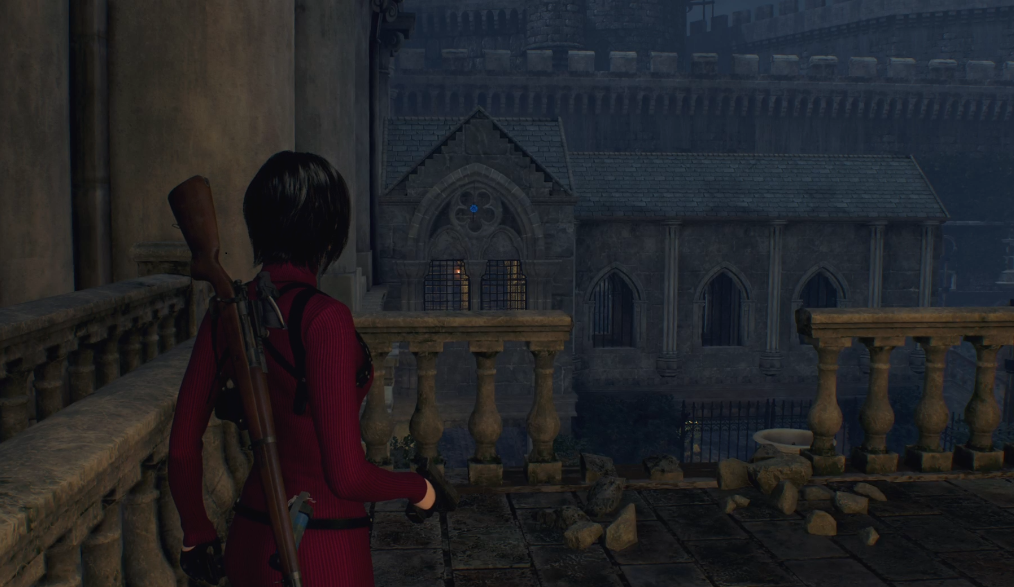
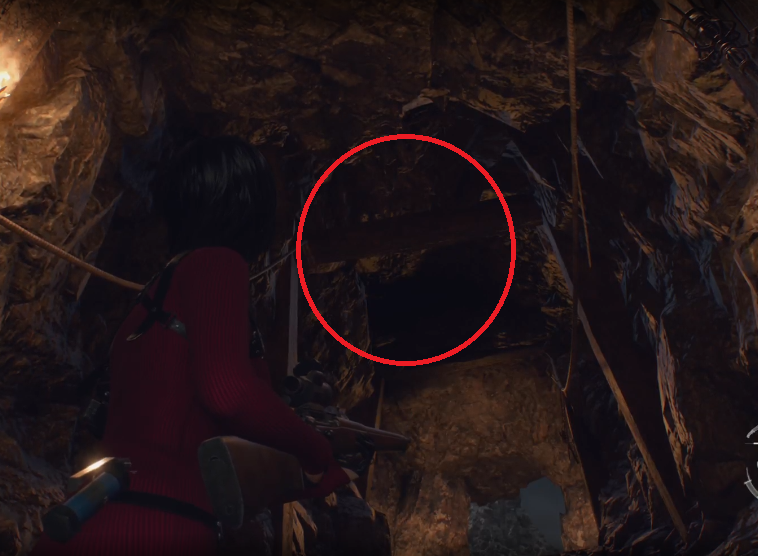
This is in Chapter 2, in the same cliffside area as the puzzle door. The request flier for this one is up on the highest walkway, accessible through the grapple from the puzzle door, and it’s worth 6 spinels.

The first one is underneath the walkway that the request is on.

The second one is at the end of the walkway the request is on.

Three is across the way from the request walkway. If you picked up the rifle and scope at the castle, it’s a lot easier to see.

From the request walkway, the last one is at the tree tops. If you on a lower walkway, it’ll be behind the same tree.
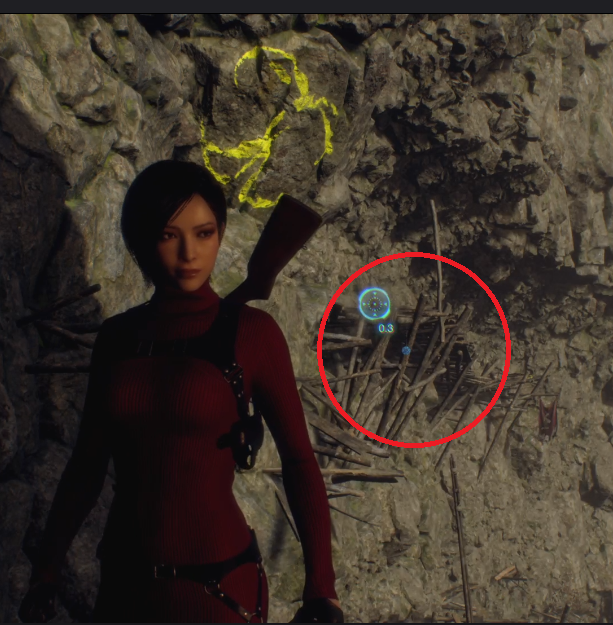
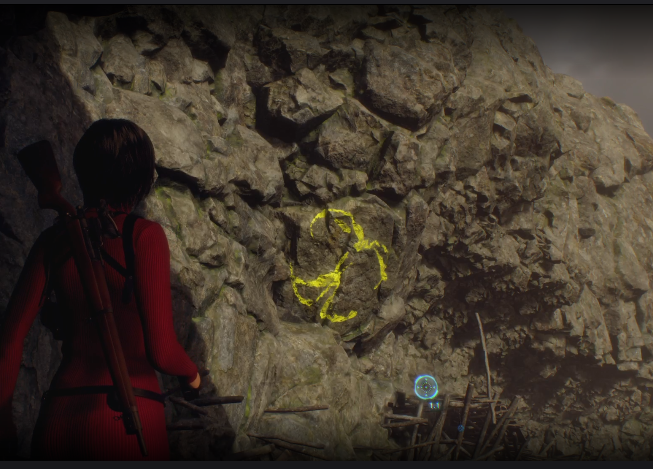
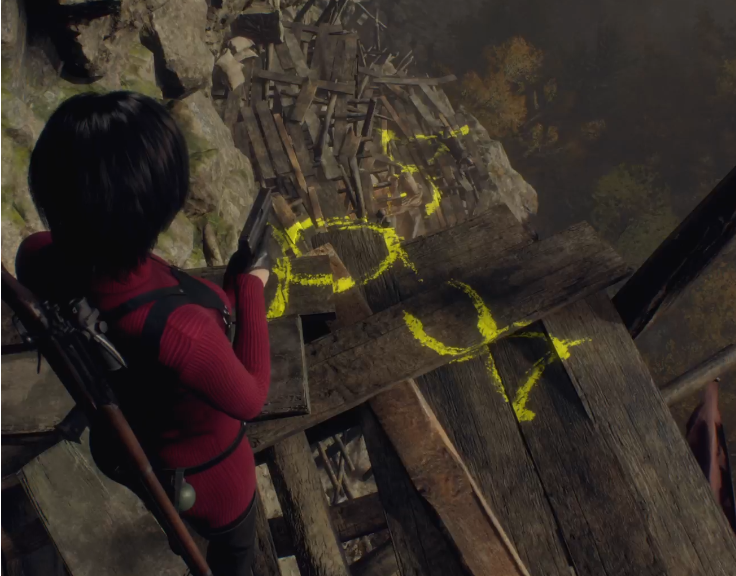
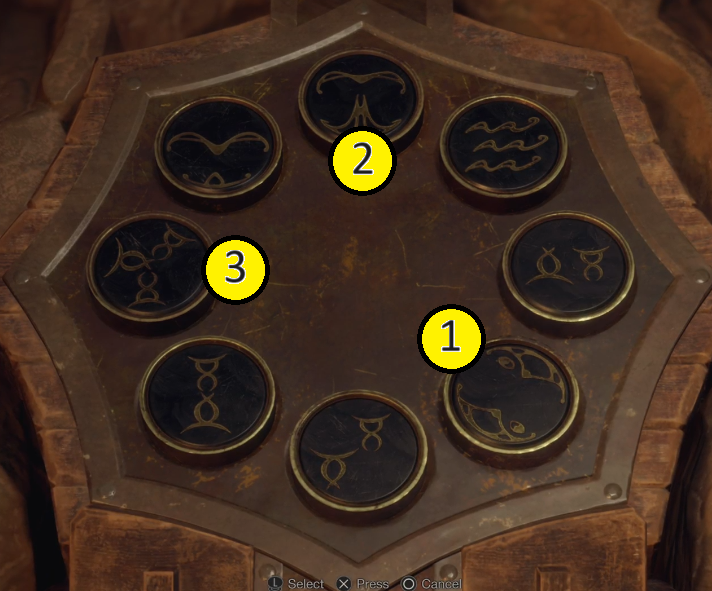
Cliffside Puzzle

This is the same type of puzzle from the main game. The three symbols are scattered around, the first two being the easiest to see. If you want to see the third one, grapple over to the cliffside walkway where the Blue Medallion request is and walk to the end.


Jacket of All Trades

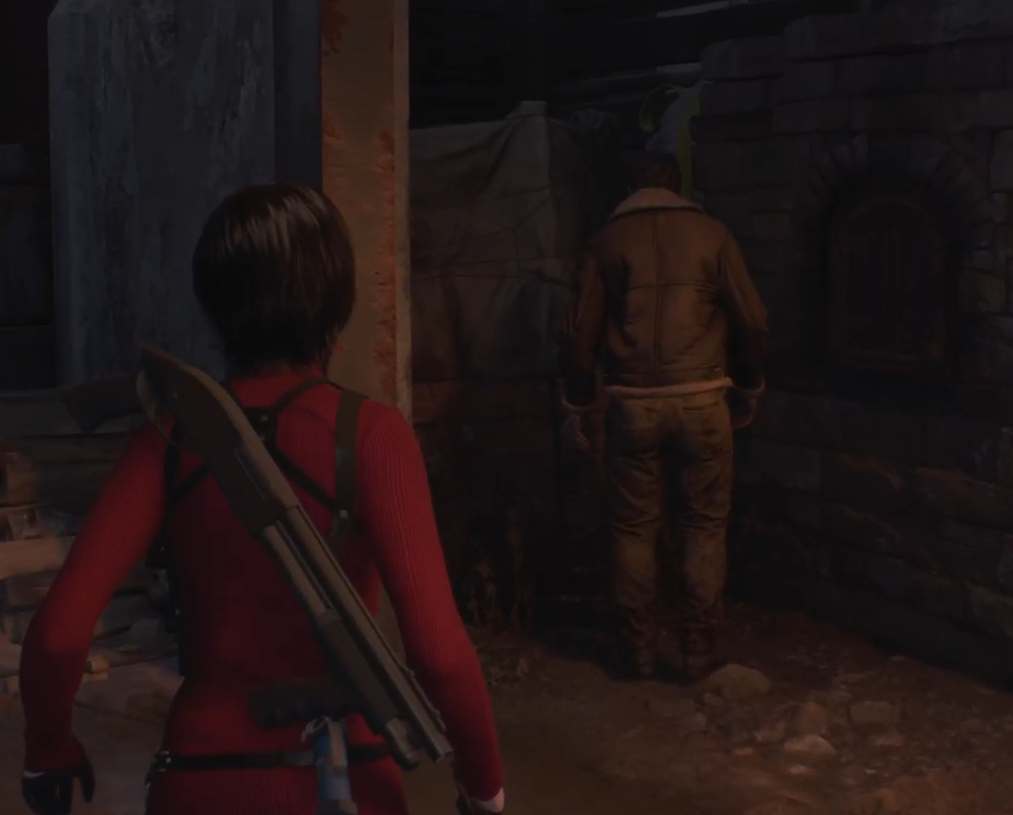
This is in Chapter 3. The request flier for this one can be found next to the door into the factory, and it’s worth 7 spinels. All you need to do is kill and loot the villager that’s wearing Leon’s coat.
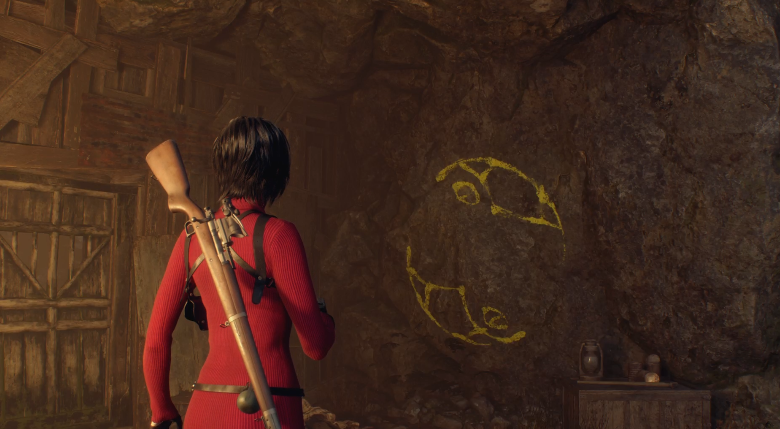
Bindery Puzzles

The lithograph symbols for the DLC are the same regardless of difficulty, unlike in the main game.

Top – red square seashell
Left – red hexagonal something, i honestly don’t know
Right – blue square umbrella
Bottom – blue hexagonal girl in a dress

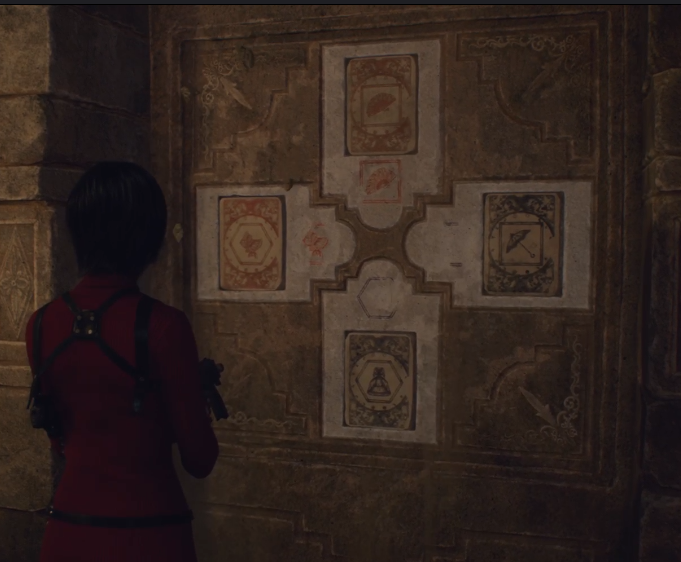
Once you’re in the bindery, loot everything before completing the puzzle for the ink. Once you pick up the ink, you can no longer loot and there is treasure hanging from the ceiling in this room.

Find the set of shields that are to the left of the fireplace and shoot them in this order. (1) bottom row left, (2) top row right, (3) bottom row right

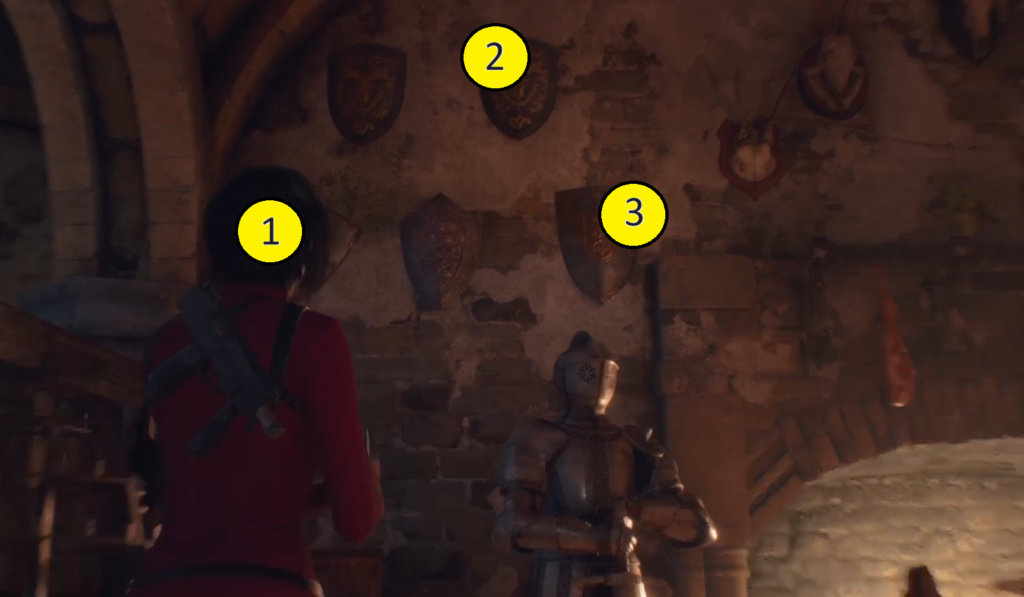
That will open a drawer where you can pick up the ink needed.
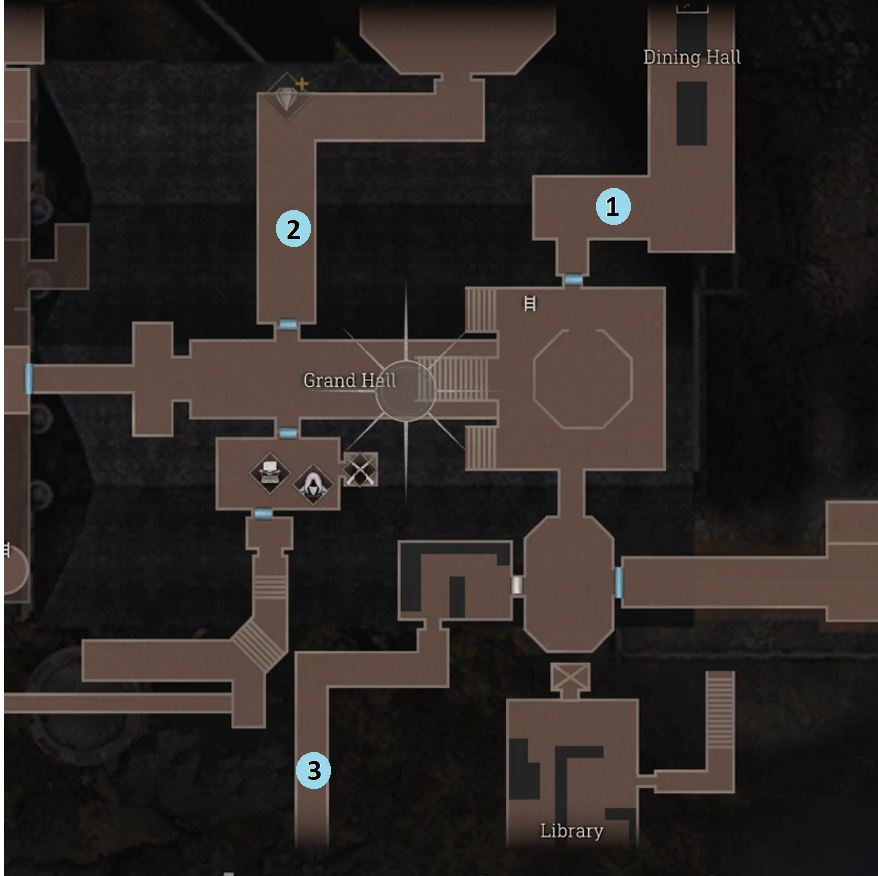

Blue Medallions #2

This is in Chapter 4. The request flier for this one can be found next to the merchant. It’s worth 7 spinels. The medallions are in the Courtyard.

When you first enter the courtyard and pass under the above walkway, turn around and look up.

Then turn back forward and look up the stairs that Leon and Ashley took during the main game.

The dog cage over on the right of the entrance to the courtyard has the 3rd medallion in it.

The fourth one is in the tower in the southeast corner.

For the last one, take the Blue Moonstone to the exit door and turn around and look at the central building.


Lord of the Waterway

This is in Chapter 5 in the Waterways. The request flier for this one can be found next to the door to the merchant, and it’s worth 8 spinels.

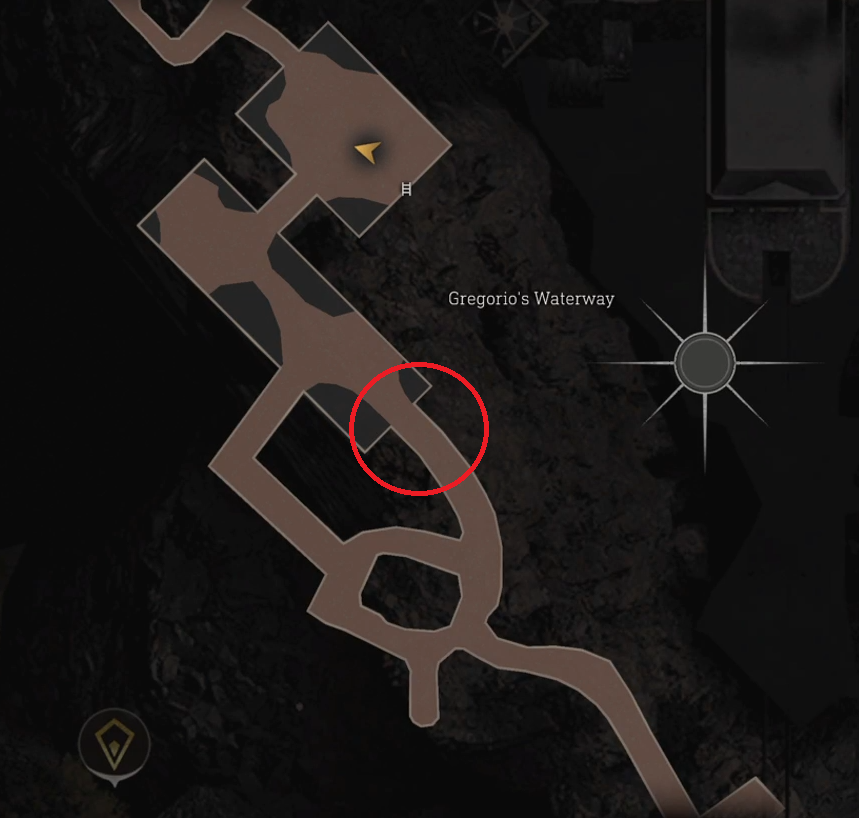
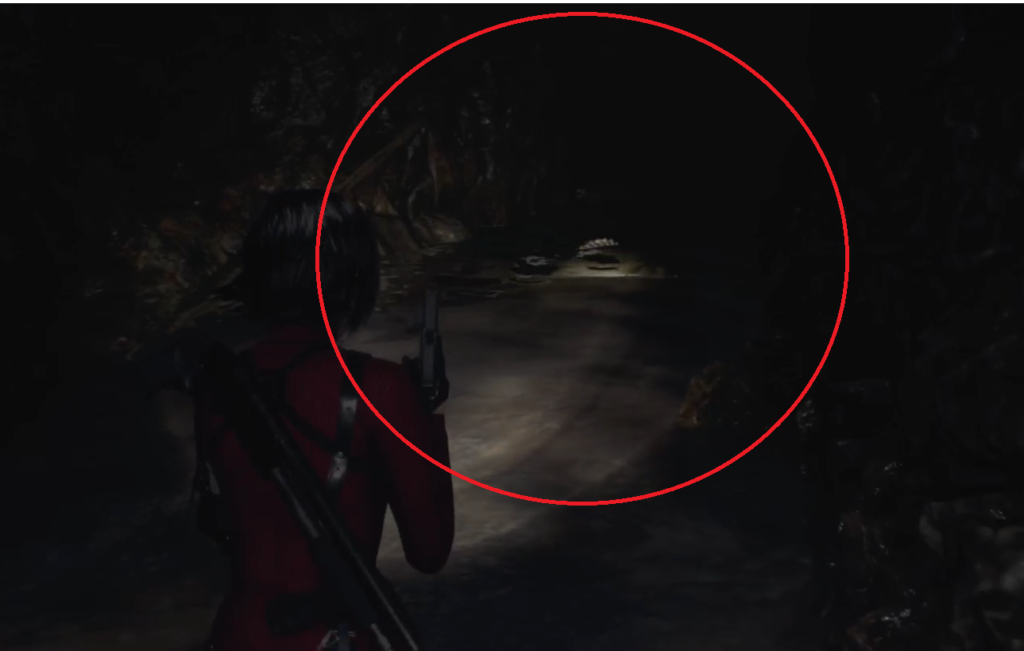
It’s hard to get a good picture of the little guy, but he’s a fish swimming around in this area of the Waterways. If you find you don’t have room in your briefcase, just store a weapon and go sell him right away.
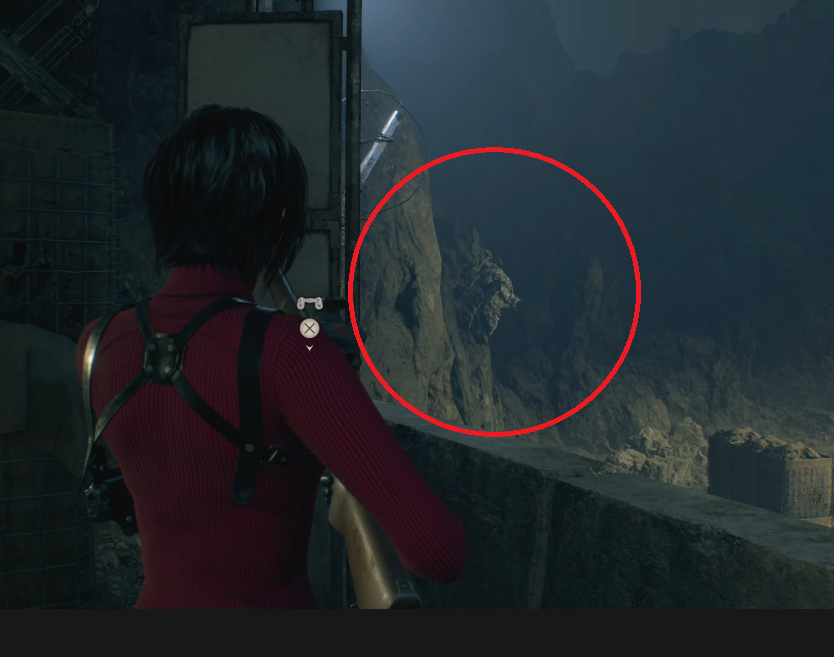

Bug Busters

This is in Chapter 5 in the Penitence Hallway. The request flier for this one can be found next to the door to the merchant, and it’s worth 8 spinels.

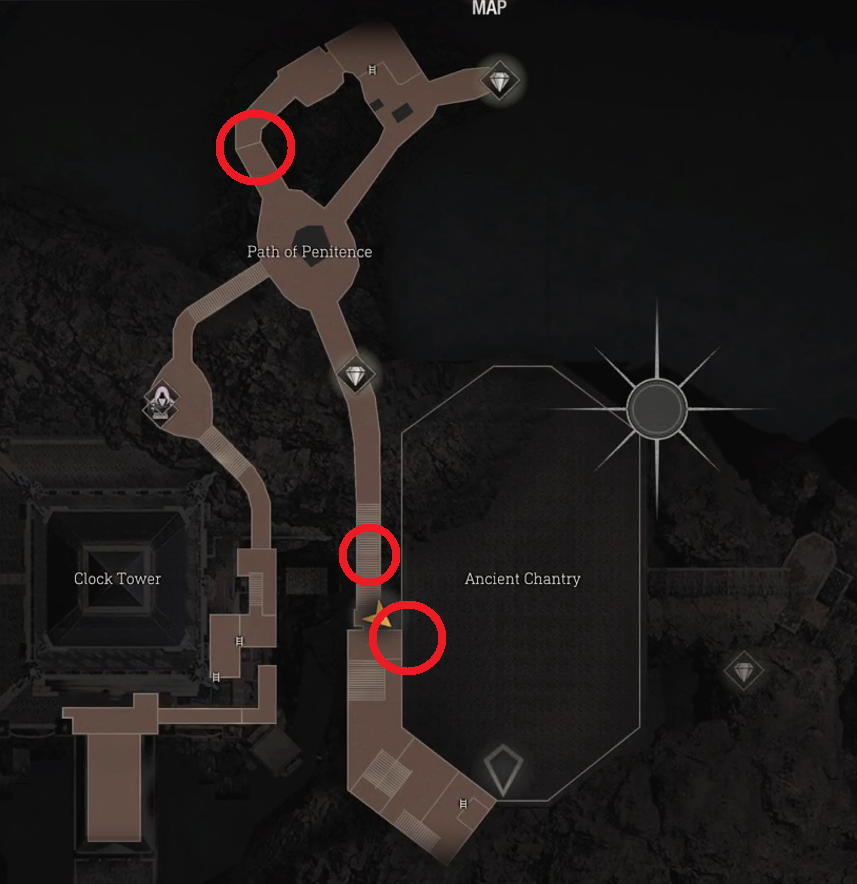
There are three of them.

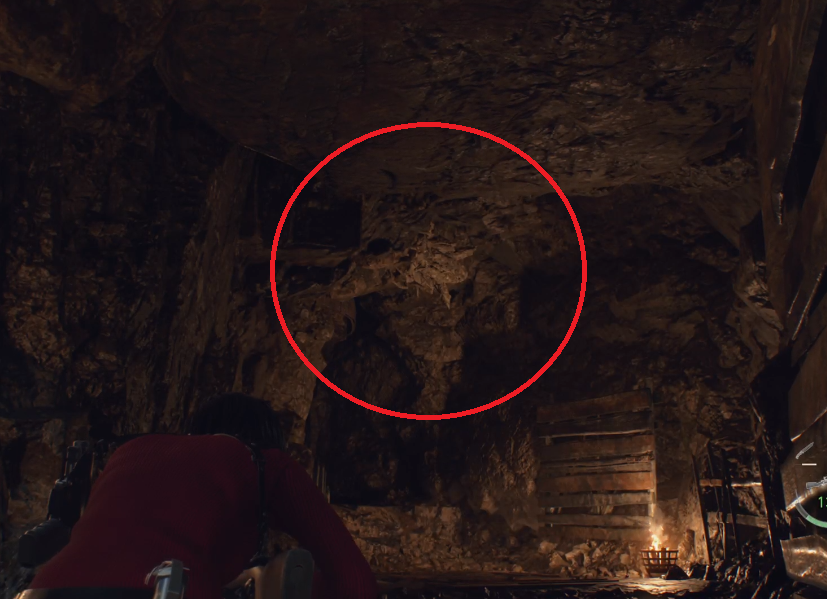
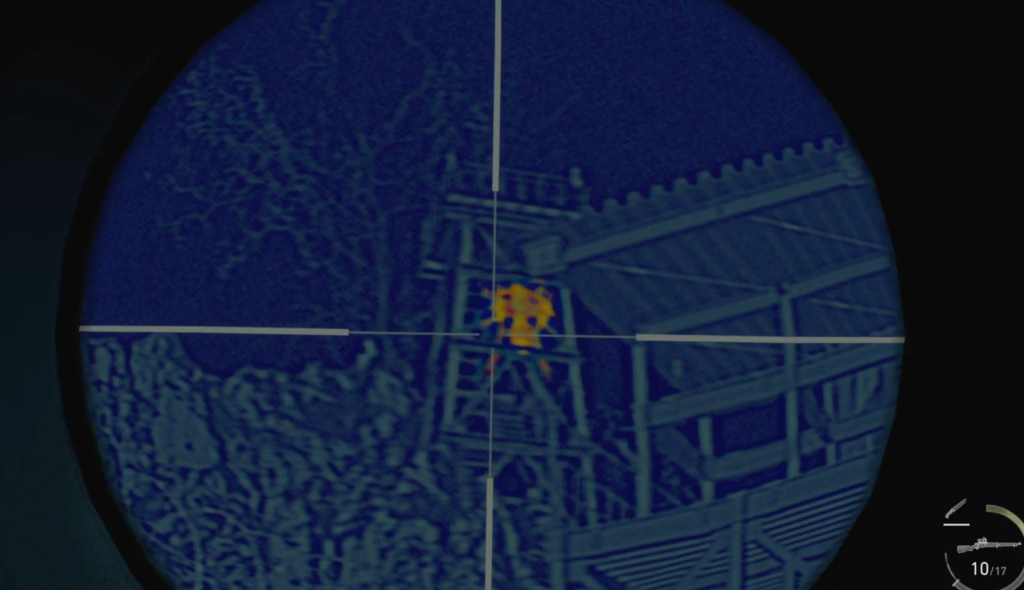
You can safely get this one from the main room by using the biosensor scope on a rifle. It’s between the two pounding rocks on the north side, on the ceiling.

The second one is on your way up the stairs to the outside. It’s easiest to see if you walk up and then turn around and look at the ceiling. Use the biosensor scope if you’re having trouble locating it.

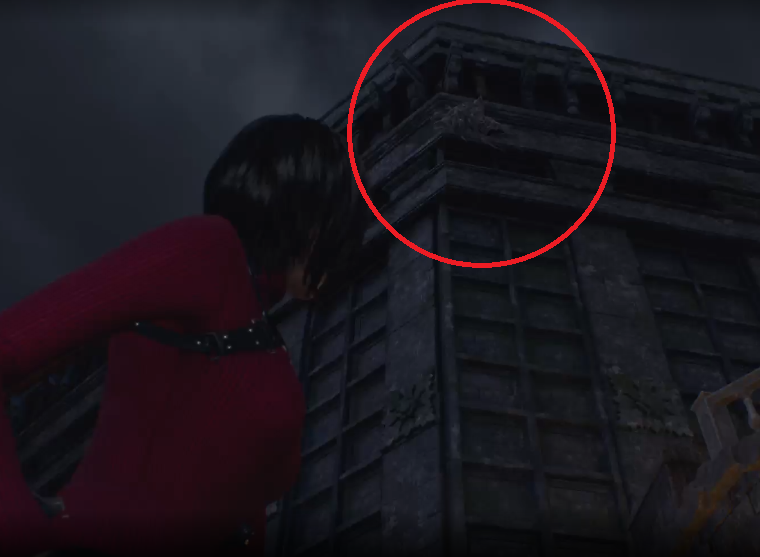
The last one can be found outside on the upper edges of the building.
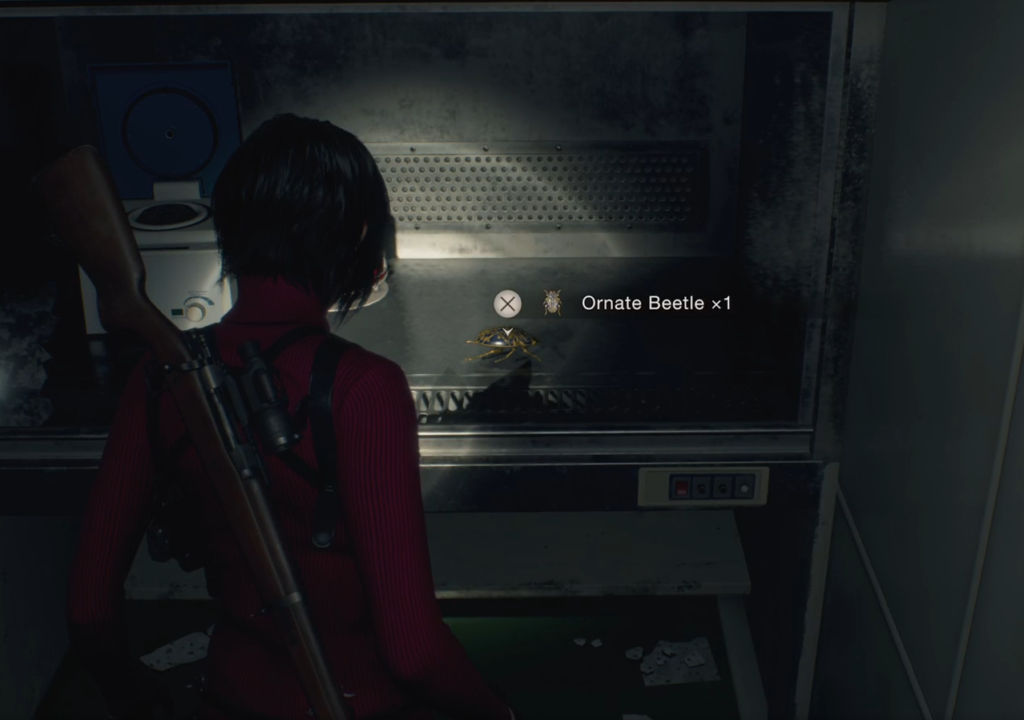
Beautiful Beetles

This is in Chapter 6 in the Facilities Area. The request flier for this one can be found next to the door to the merchant, and it’s worth 10 spinels.

The two beetles can be found in the Incubation Lab and the south Dissection room.

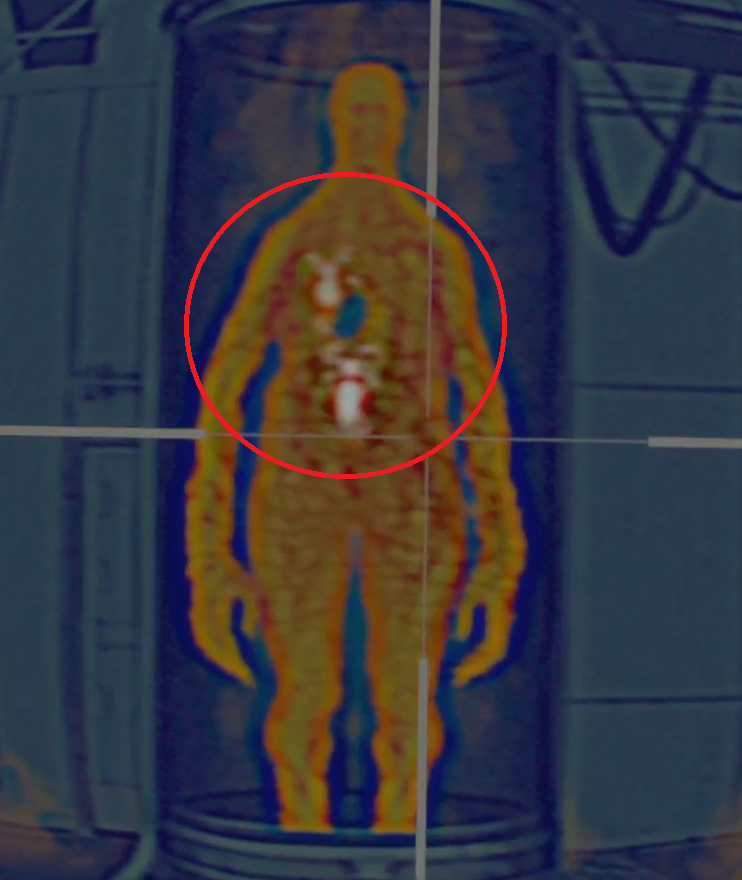
You don’t need the biosensor scope to kill this guy but it will make your life so much easier! If you have the scope, line up your first shot from the right side so you can hit two of the plagas at once (depending on your difficulty). That’ll make one less shot you need to take afer the first one.

The second one isn’t in a regenerator, but it’s being guarded by one, so either lure him out to get at the beetle or take him out. Then smash the glass to get to it.

Sell both of them to the merchant to complete the request.
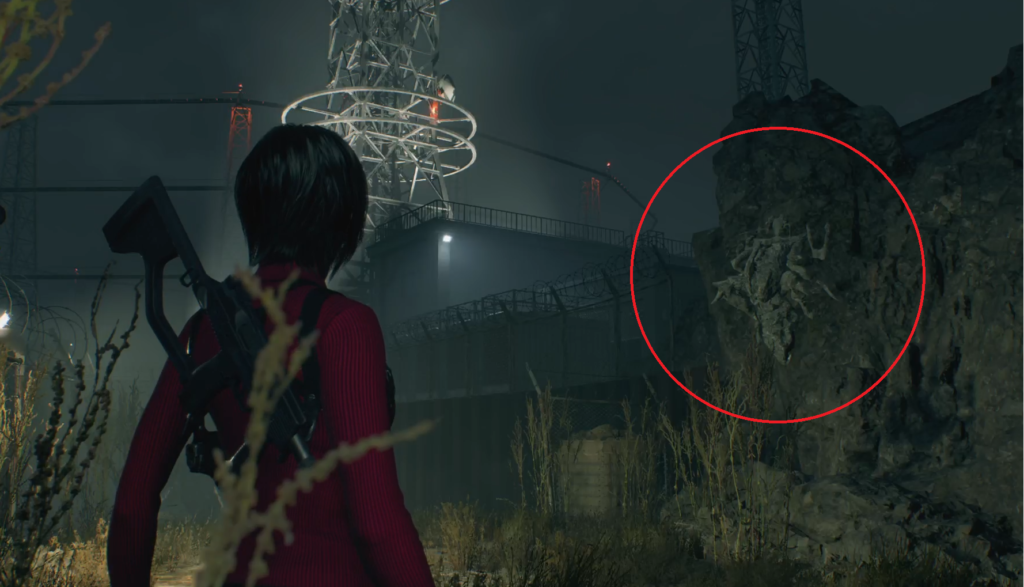

Bug Buster #2

This is in Chapter 6 on the Defensive Line. The request flier for this one can be found by the drop down into the Defensive Line, and it’s worth 9 spinels.

The first bug is just inside the Defensive Line on the left.

The second Novi is up on the tower on the right about midway through. You don’t need the biosensor scope to see it, but it helps.

The last Novi is in the back behind the third laser bunker.

RE4R Request: Chapter 15 Medallions #6

In Chapter 15, there are 5 medallions to shoot before you enter the Specimen Storage building for 5 Spinel. Note that once you go through the first wheel door inside, you cannot come back out here. And if you miss #1 in the tower, you can’t see it from the Sanctuary side. I tried :/ 🙂

  1. Top of the belltower – Look above Speciman Storage – you cannot see this one from the other side if you miss it!!!
  2. Left of Specimen Storage – Stop at the scaffolding and look up. It’s below the fire on the roof.
  3. Behind the ladder that goes down – Stand by the ladder that goes down and look behind it to the right.
  4. Lower Cliffside – Go down the ladder, through the tunnel and out and look down the way and slightly up.  It’s hanging from a ruin.
  5. Lower Cliffside – Stand basically under #4 and look out towards the water.  Check the map to make sure you’re facing the right direction.
read more

RE4R Request: Chapter 14 Medallions #5

In Chapter 14, Cargo Depot, there are 5 Medallions at the start of the chapter. You can get 5 Spinels for shooting them down.

  1. East – Stand at the top of the stairs and look down into the area to the east that is on the other side of the fence. You can also see it from the barbed wire fence.
  2. Above the entrance door – Enter the Cargo Depot, walk to the stairs, turn around and look above the door a couple of stories.
  3. Northwest corner – After dropping down the ladder into the west half, go to the west side, turn around and look back east.
  4. South – From the northwest corner, head south to the middle. It’s on the east side of the two containers in that area.
  5. Southwest – In the southwest corner, look up. It’s hanging from one of the levels on a taller thing to the south.
read more

RE4R Request: Chapter 12 The Disgrace of the Salazar Family

At the start of Chapter 12 you’re back upstairs. There is a notice to Disgrace the Salazar Family on the wall by the Gondola that you ride to the Clock Tower.

The Merchant asks you to throw something at the Portrait of Ramon found in the Throne room. When you get there, you’ll notice there are now chickens running around and at least one of them was good enough to lay an egg for you. Throw an egg at his portrait to complete the request. You can find it to the left of the throne.

Continue reading RE4R Request: Chapter 12 The Disgrace of the Salazar Family

RE4R Request: Chapter 12 Jewel Thief

At the start of Chapter 12 you’re back upstairs. There is a notice to catch a Jewel Thief on the wall by the Gondola that you ride to the Clock Tower. The Merchant is asking you to track down a missing Scratched Emerald in the courtyard.

Head back to the courtyard and a crow will lead you west back towards the Merchant area that was by the Wine Cellar. The nest is on the roof just before that Merchant location. It’s not actually in the Courtyard. That’s just where you first see the crow.

The wall down from the Merchant holds two requests. This one and The Disgrace of the Salazar Family one.

There are two notices outside of the Merchant area in Chapter 12.
read more

RE4R Request: Chapter 9 Pest Control

In Chapter 9, there is a notice outside of the Dining Room asking you to take care of 3 different rats for the Merchant. Two of them can be found during chapter 9, but the last one cannot be gotten until chapter 10, when Leon can go into the areas that Ashley opened.

  1. Dining Room – When you first enter, it’s running around between the Grand Hall and the actual dining area.
  2. Armory Exit – The hallway after the fight.  It’s just after the cubic device treasure chest.
  3. Animal head hallway – West of the library. You first come here as Ashley.
read more

RE4R Request: Chapter 9 Medallions #4

The Grand Hall area has 6 different medallions you can shoot down for 5 Spinels. The flier for this request can be found in the Merchant’s room on a table.

  1. Entryway – Above the right cabinet when you enter the Grand Hall.
  2. Chandelier – Head upstairs on the north side and look at the chandelier.
  3. Behind statue – Go stand behind the statue and look up.
  4. Dining Room – Behind one of the curtains in the back right .
  5. Upstairs Armory – South side, behind a chair.
  6. Gallery – On the ground floor, head to the goat head area and turn around and look back at the entryway.
read more

RE4R Request: Chapter 7 Medallions #3

In chapter 7, you can get the Medallions #3 request. It’s worth 5 Spinels. The request flier is actually found after you get the Castle Gate open, but the medallions themselves are amongst the catapult area.

  1. First set of stairs up to the enemy area Look over to the right in a dead tree.
  2. Lowered cannon area – In the original cannon area. You can look up to the west before or after you raise the cannon. It shouldn’t matter.
  3. Catapult Level – Over the cannon/round area.
  4. Catapult Level – It’s hanging in an opening above a doorway.
  5. Catapult Level – Once you come back up there from the cannon area, drop down and go left, near the 3 barrels on the wall.
  6. Catapult Level – Look up to the north.
read more

RE4R Request: Chapter 5 Savage Mutt

In Chapter 5, when you reach the Merchant behind the Town Hall after rescuing Ashley from the church, there will be a request to take care of a “Savage Mutt”. The notice will tell you he can be found at the Village Chief’s Manor, but when you go there, he can’t be found. That’s because he’s moved on to the Village. Equip a flash grenade your strongest gun and go get him!

read more