RE4R DLC: Separate Ways All Puzzles/Requests

Blue Medallions #1 – Chapter 2, worth 6 spinels
Cliffside Puzzle Door – Chapter 2
Jacket of All Trades – Chapter 3, worth 7 spinels
Bindery Puzzles – door and shield
Blue Medallions #2 – Chapter 4, worth 7 spinels
Lord of the Waterways – Chapter 5, worth 8 spinels
Bug Busters – worth 8 Chapter 5, spinels
Beautiful Beetles – Chapter 6, worth 10 spinels
Bug Busters #2 – Chapter 6, worth 9 spinels

Blue Medallions #1

This is in Chapter 2, in the same cliffside area as the puzzle door. The request flier for this one is up on the highest walkway, accessible through the grapple from the puzzle door, and it’s worth 6 spinels.
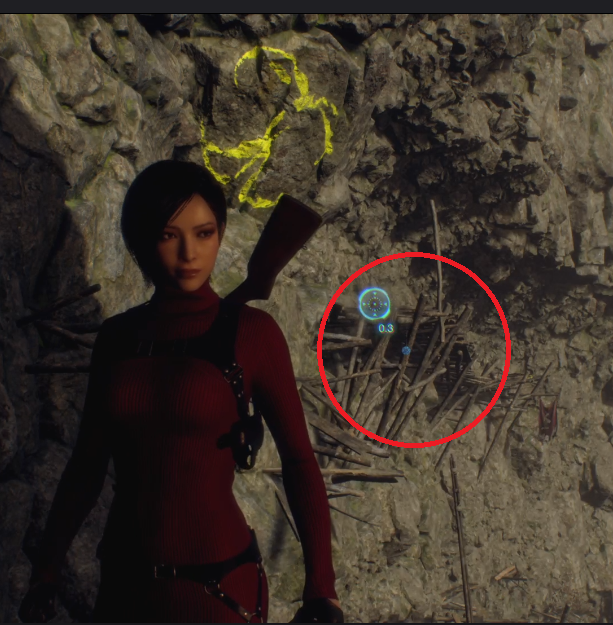
The first one is underneath the walkway that the request is on.
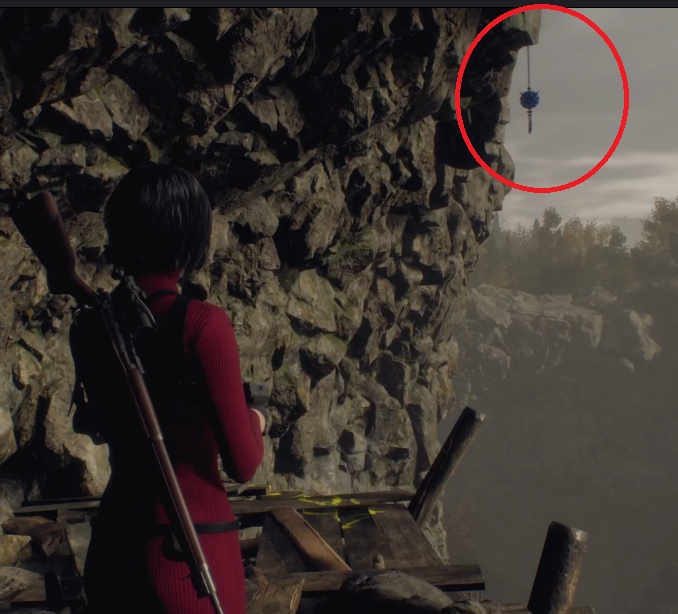
The second one is at the end of the walkway the request is on.
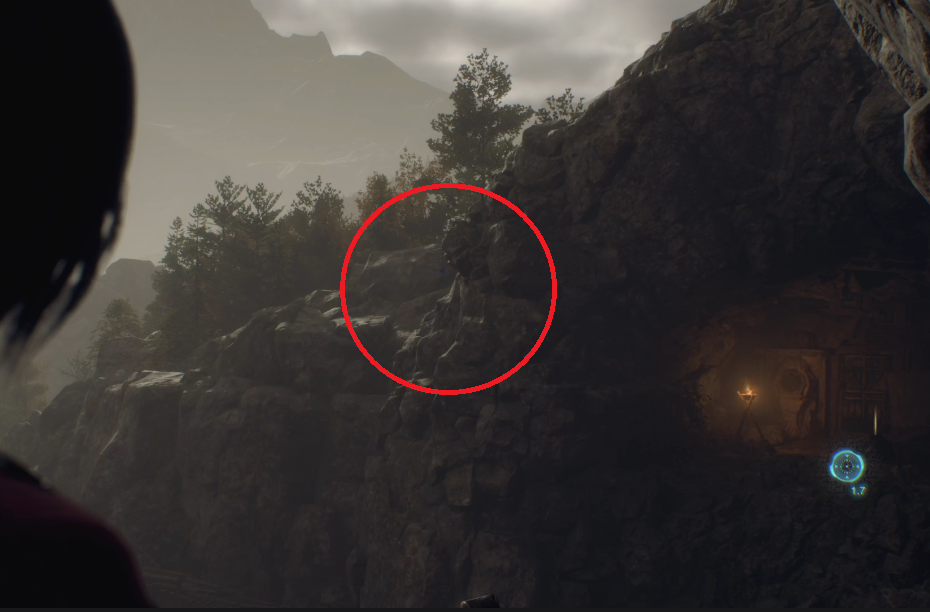
Three is across the way from the request walkway. If you picked up the rifle and scope at the castle, it’s a lot easier to see.
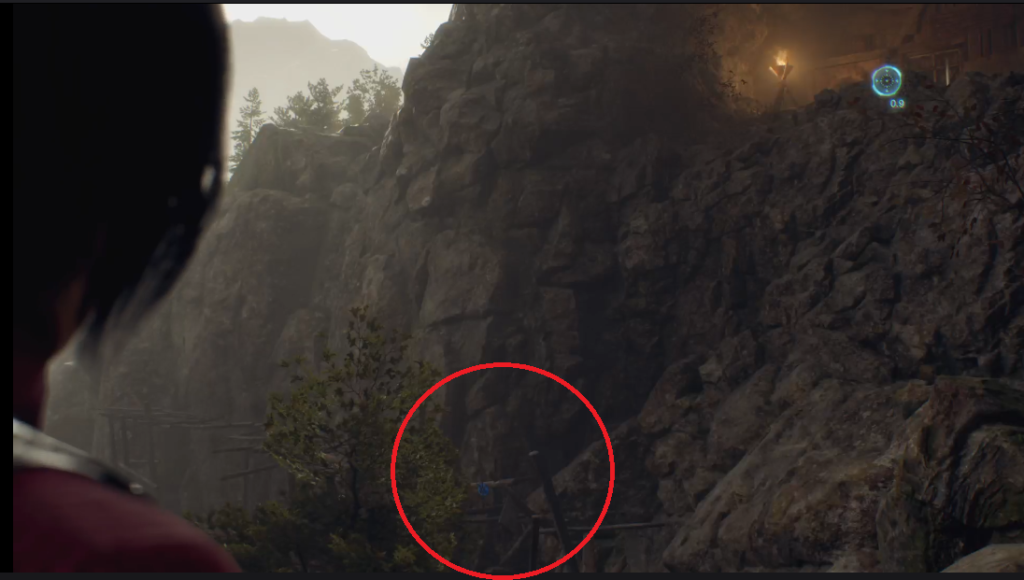
From the request walkway, the last one is at the tree tops. If you on a lower walkway, it’ll be behind the same tree.

Cliffside Puzzle

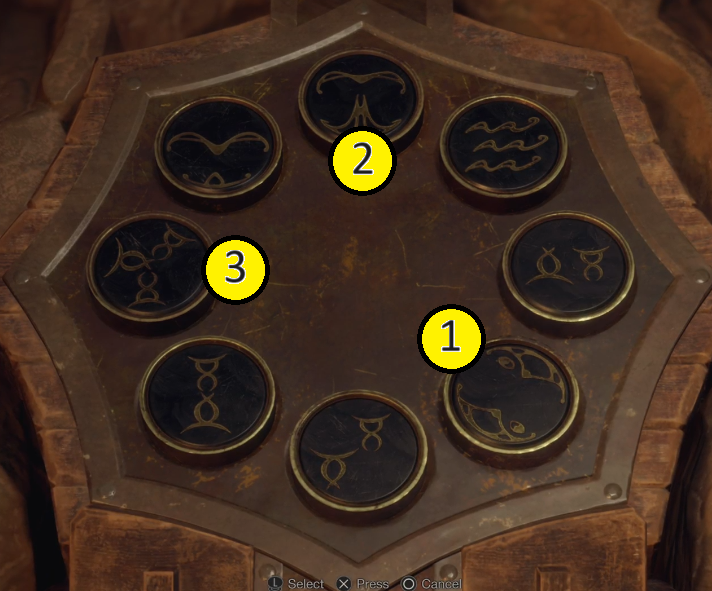
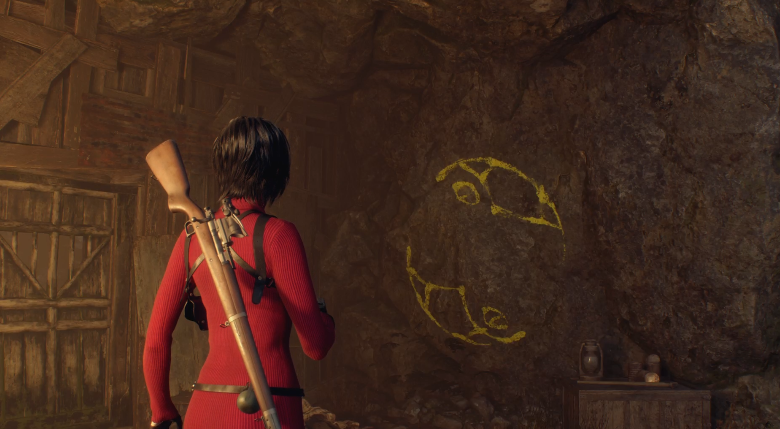
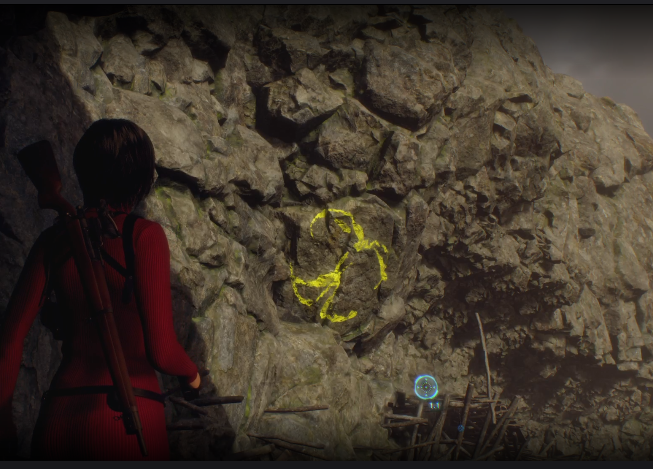
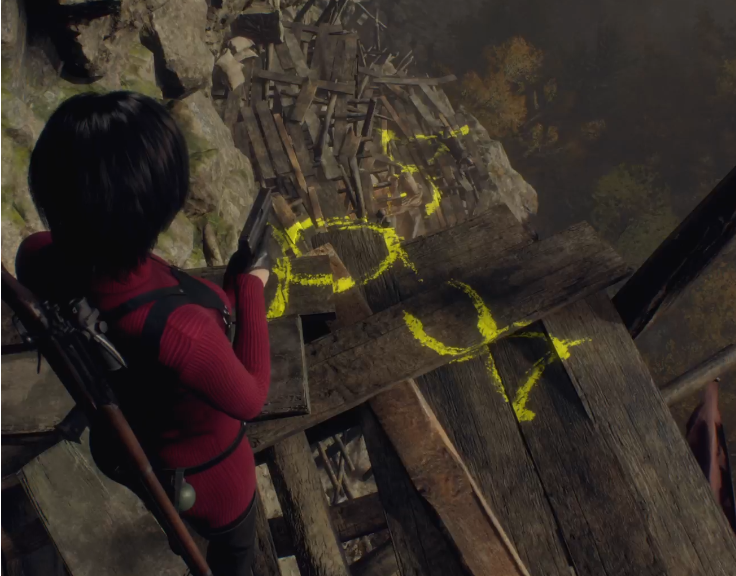
This is the same type of puzzle from the main game. The three symbols are scattered around, the first two being the easiest to see. If you want to see the third one, grapple over to the cliffside walkway where the Blue Medallion request is and walk to the end.
Jacket of All Trades

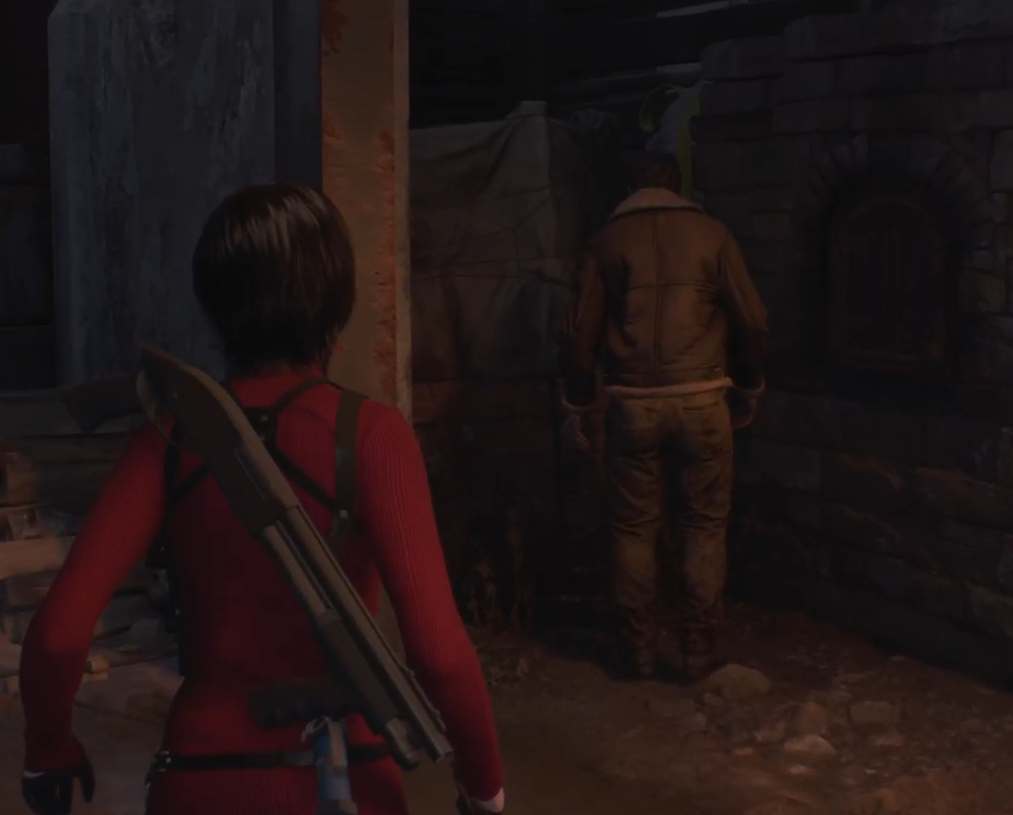
This is in Chapter 3. The request flier for this one can be found next to the door into the factory, and it’s worth 7 spinels. All you need to do is kill and loot the villager that’s wearing Leon’s coat.
Bindery Puzzles

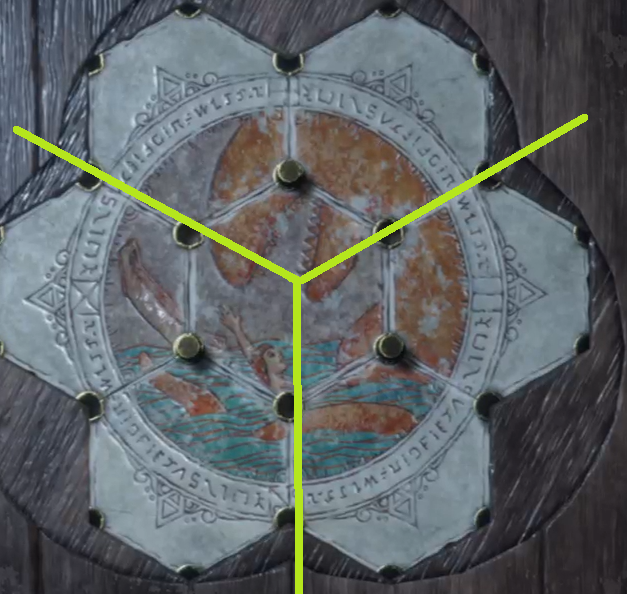
The lithograph symbols for the DLC are the same regardless of difficulty, unlike in the main game.

Top – red square seashell
Left – red hexagonal something, i honestly don’t know
Right – blue square umbrella
Bottom – blue hexagonal girl in a dress
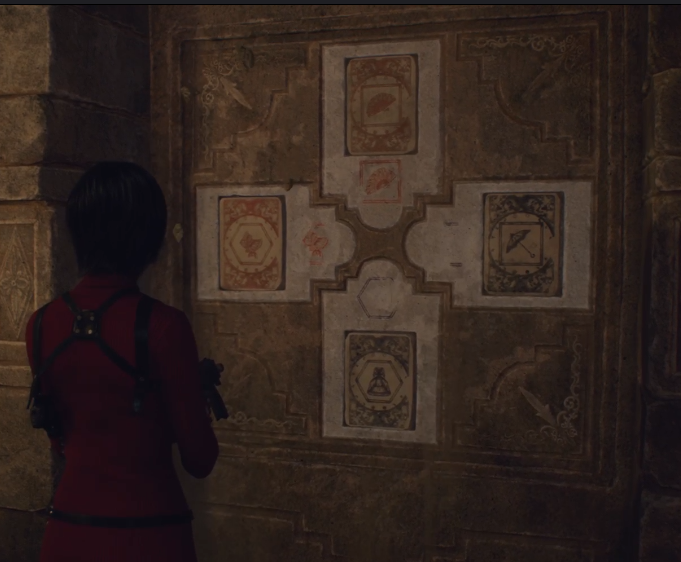
Once you’re in the bindery, loot everything before completing the puzzle for the ink. Once you pick up the ink, you can no longer loot and there is treasure hanging from the ceiling in this room.

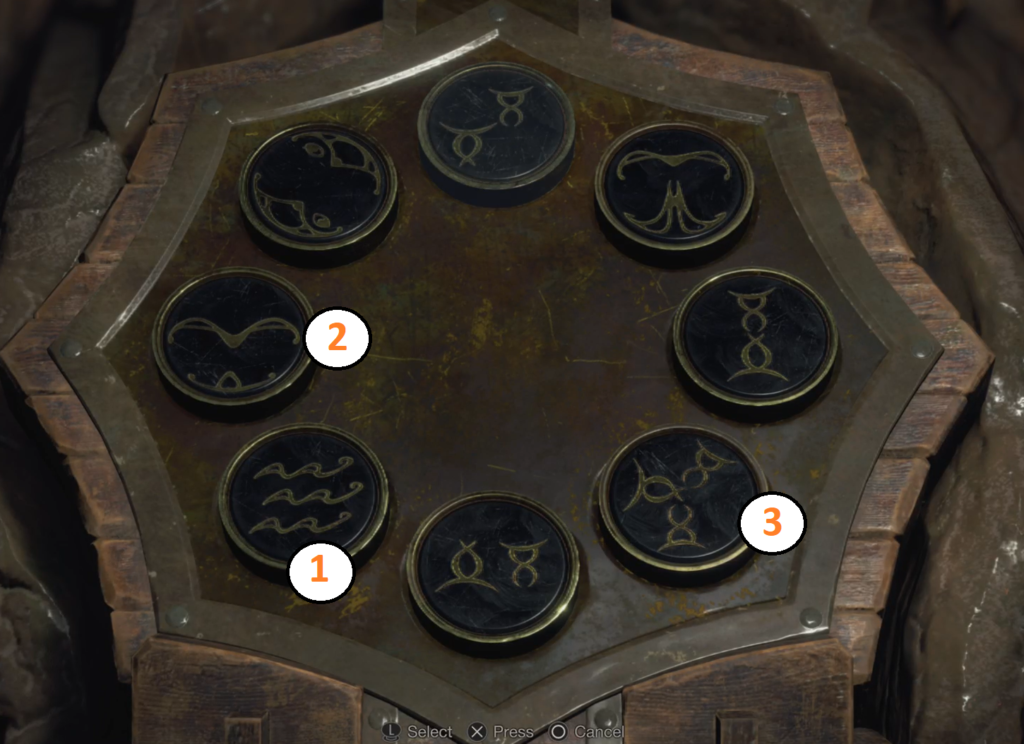
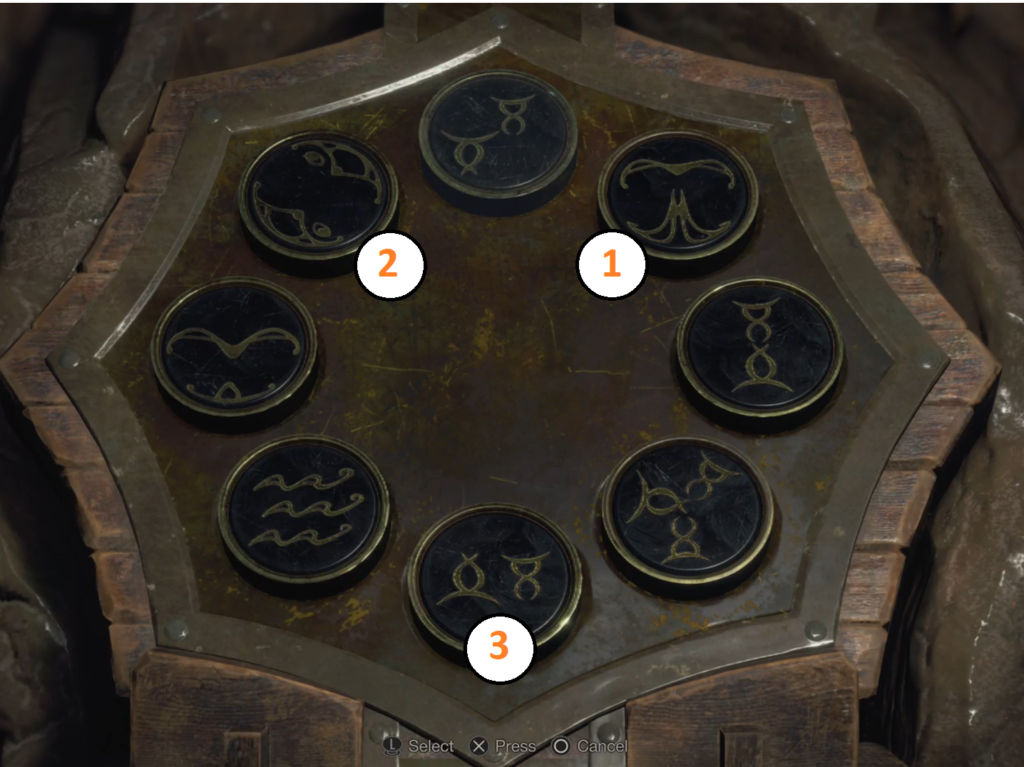
Find the set of shields that are to the left of the fireplace and shoot them in this order. (1) bottom row left, (2) top row right, (3) bottom row right
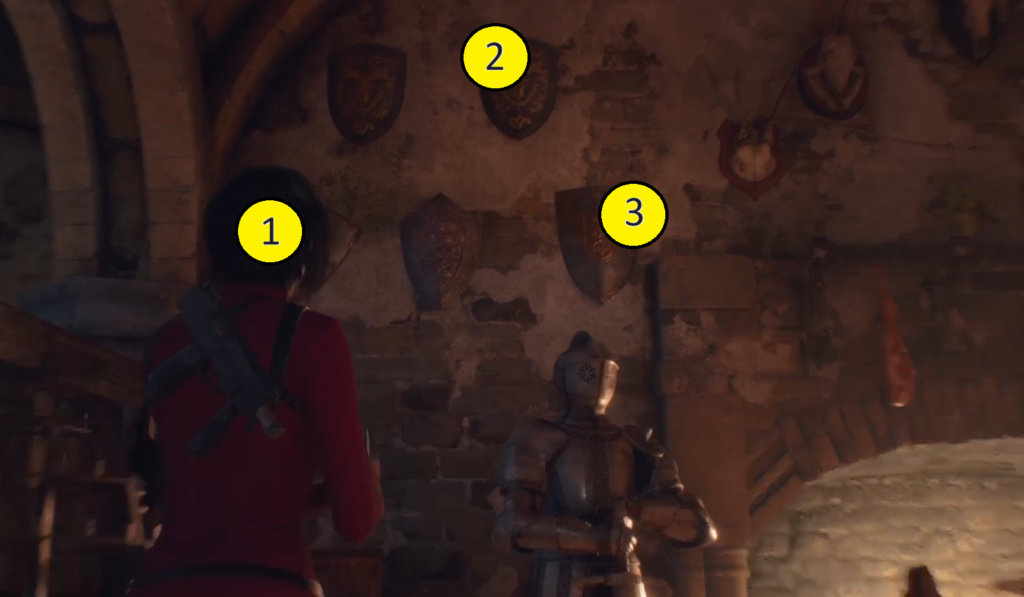
That will open a drawer where you can pick up the ink needed.


Blue Medallions #2

This is in Chapter 4. The request flier for this one can be found next to the merchant. It’s worth 7 spinels. The medallions are in the Courtyard.
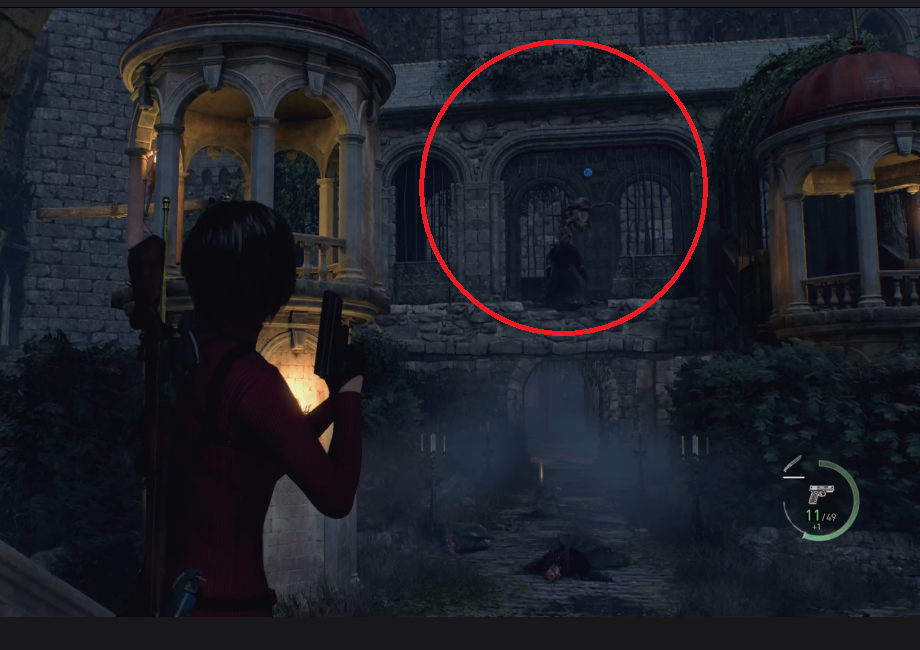
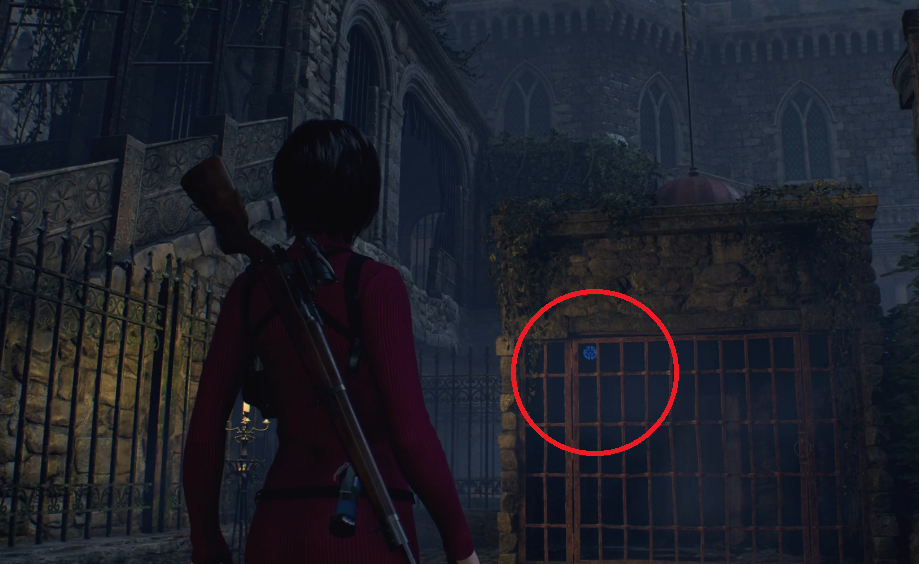
When you first enter the courtyard and pass under the above walkway, turn around and look up.
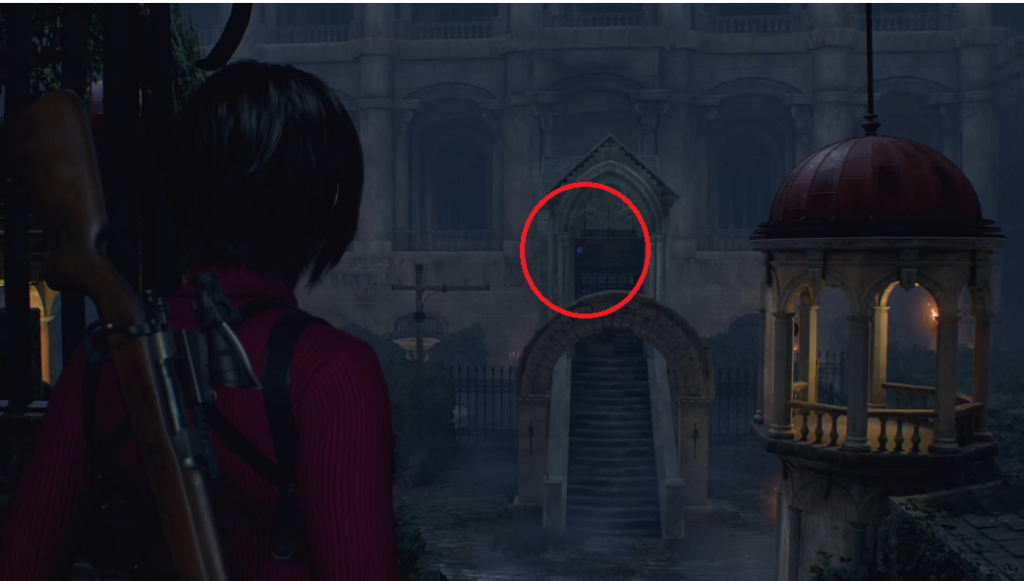
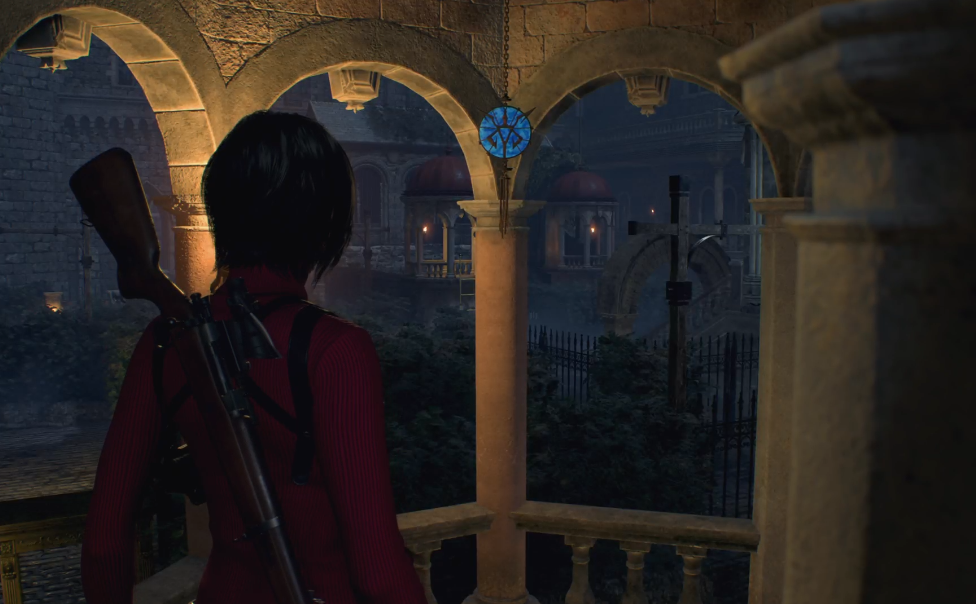
Then turn back forward and look up the stairs that Leon and Ashley took during the main game.
The dog cage over on the right of the entrance to the courtyard has the 3rd medallion in it.
The fourth one is in the tower in the southeast corner.
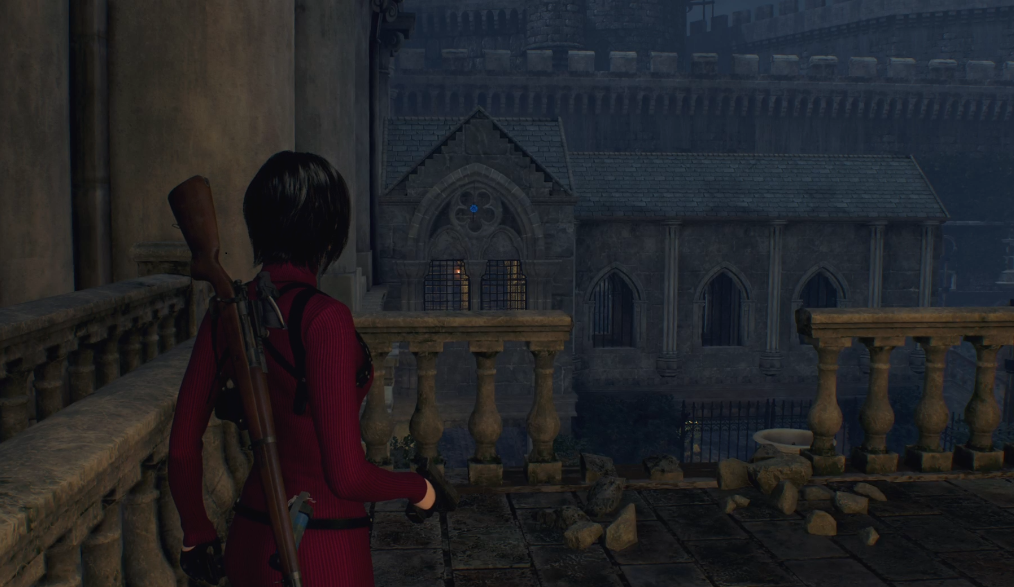
For the last one, take the Blue Moonstone to the exit door and turn around and look at the central building.


Lord of the Waterway

This is in Chapter 5 in the Waterways. The request flier for this one can be found next to the door to the merchant, and it’s worth 8 spinels.
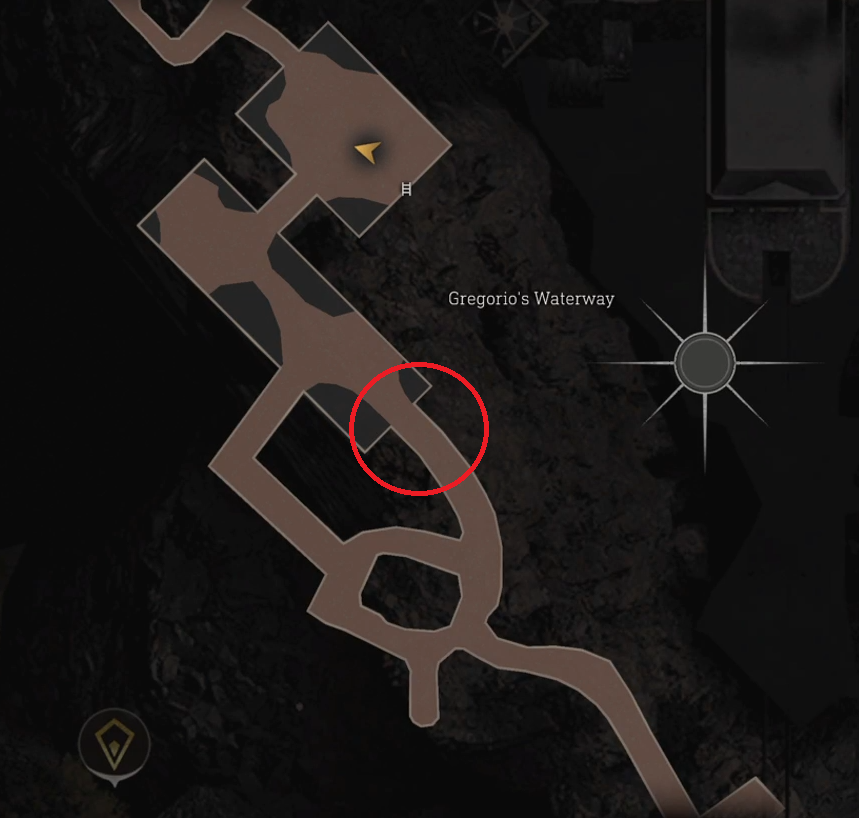
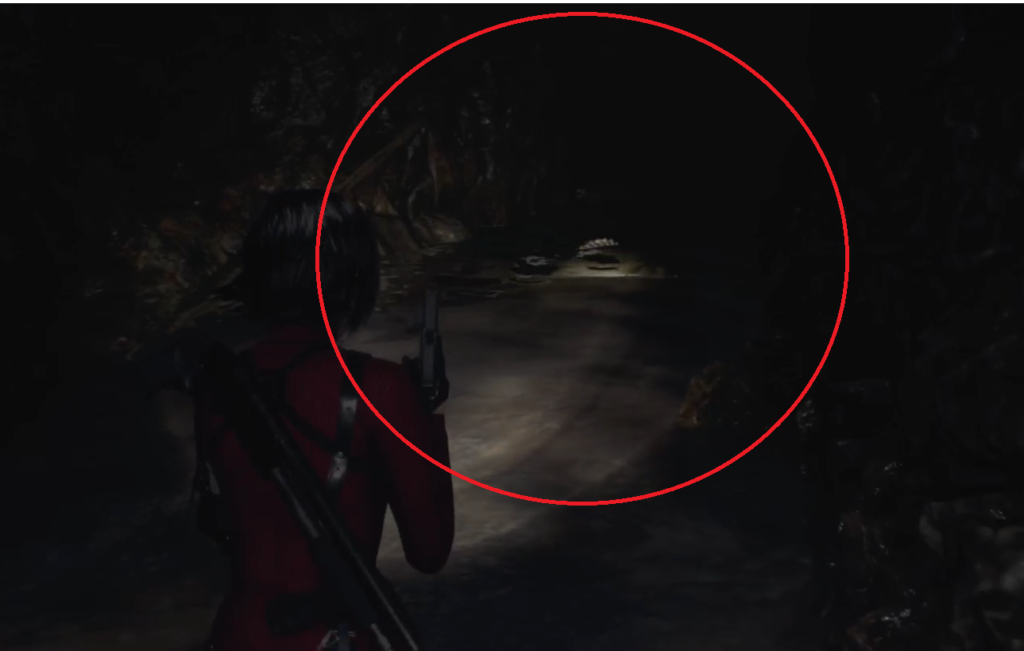
It’s hard to get a good picture of the little guy, but he’s a fish swimming around in this area of the Waterways. If you find you don’t have room in your briefcase, just store a weapon and go sell him right away.


Bug Busters

This is in Chapter 5 in the Penitence Hallway. The request flier for this one can be found next to the door to the merchant, and it’s worth 8 spinels.
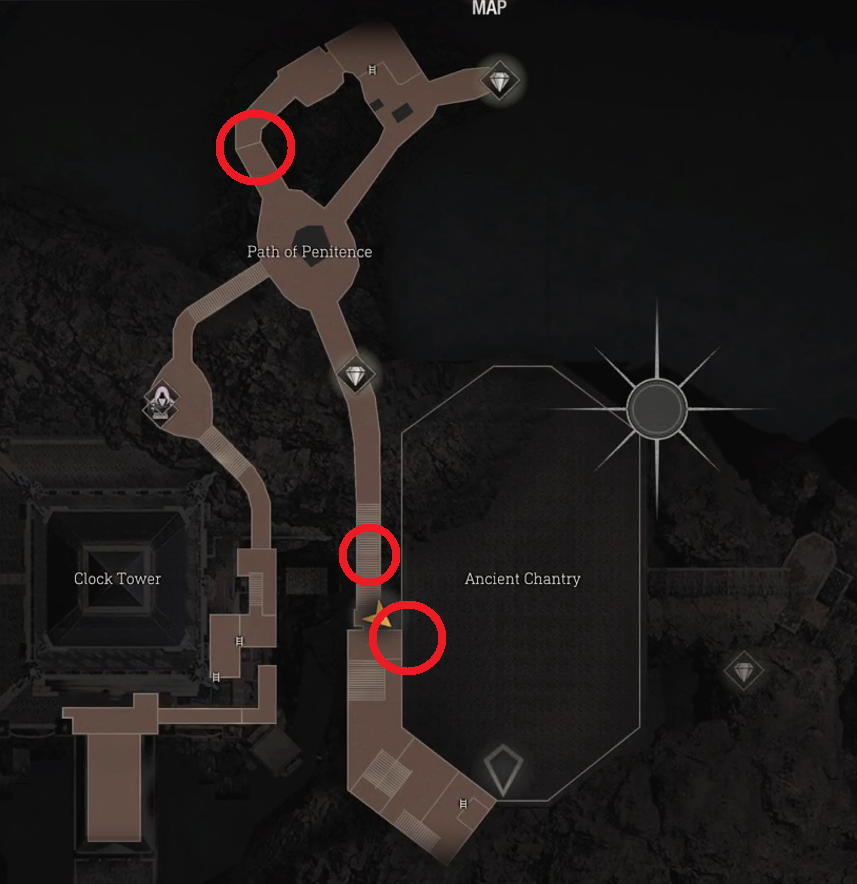
There are three of them.
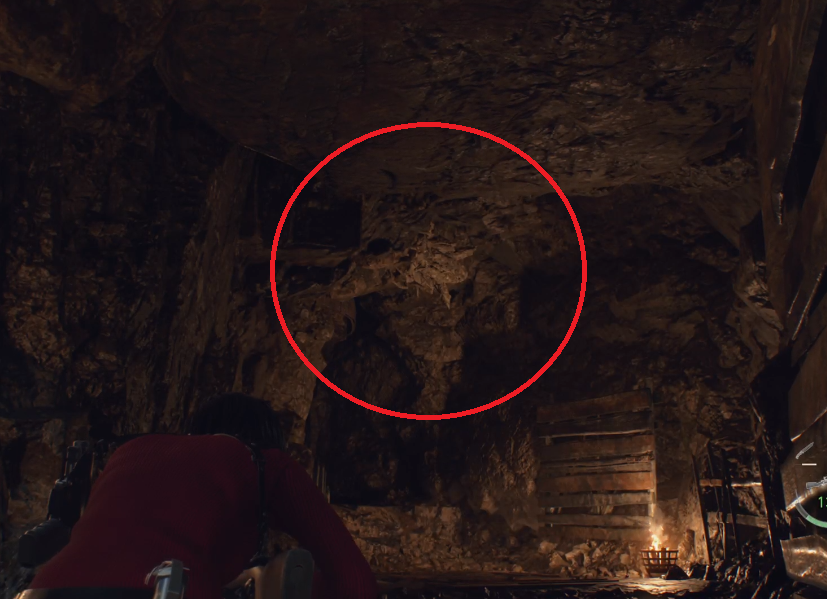
You can safely get this one from the main room by using the biosensor scope on a rifle. It’s between the two pounding rocks on the north side, on the ceiling.
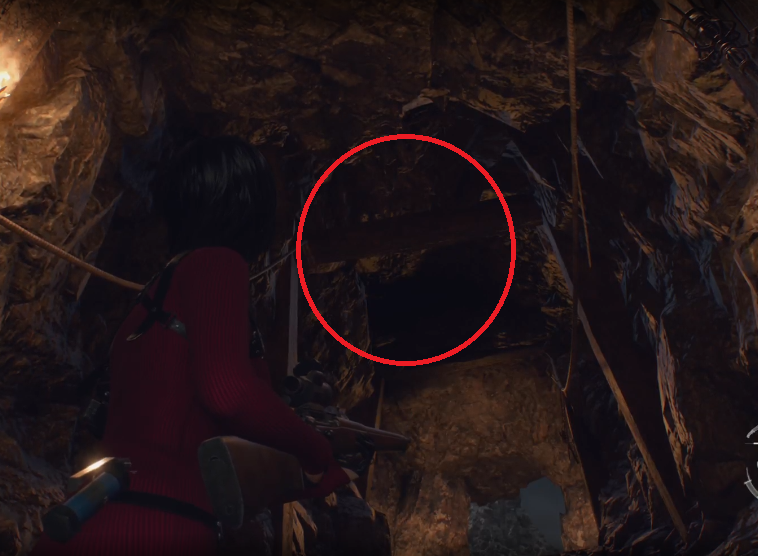
The second one is on your way up the stairs to the outside. It’s easiest to see if you walk up and then turn around and look at the ceiling. Use the biosensor scope if you’re having trouble locating it.
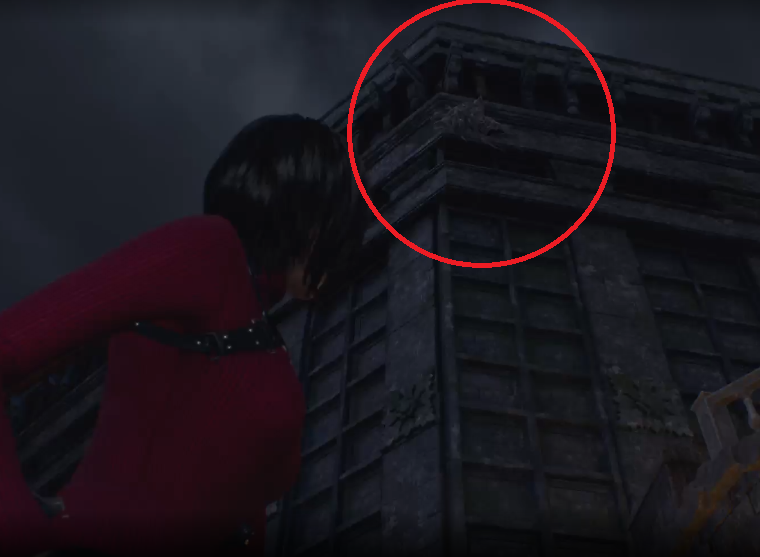
The last one can be found outside on the upper edges of the building.

Beautiful Beetles

This is in Chapter 6 in the Facilities Area. The request flier for this one can be found next to the door to the merchant, and it’s worth 10 spinels.
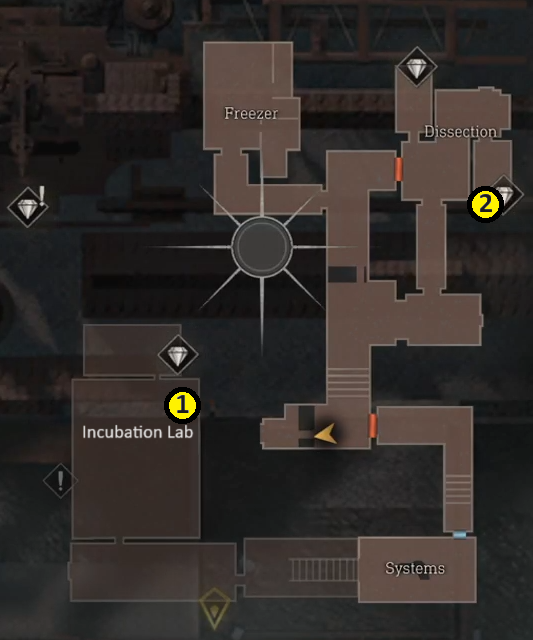
The two beetles can be found in the Incubation Lab and the south Dissection room.
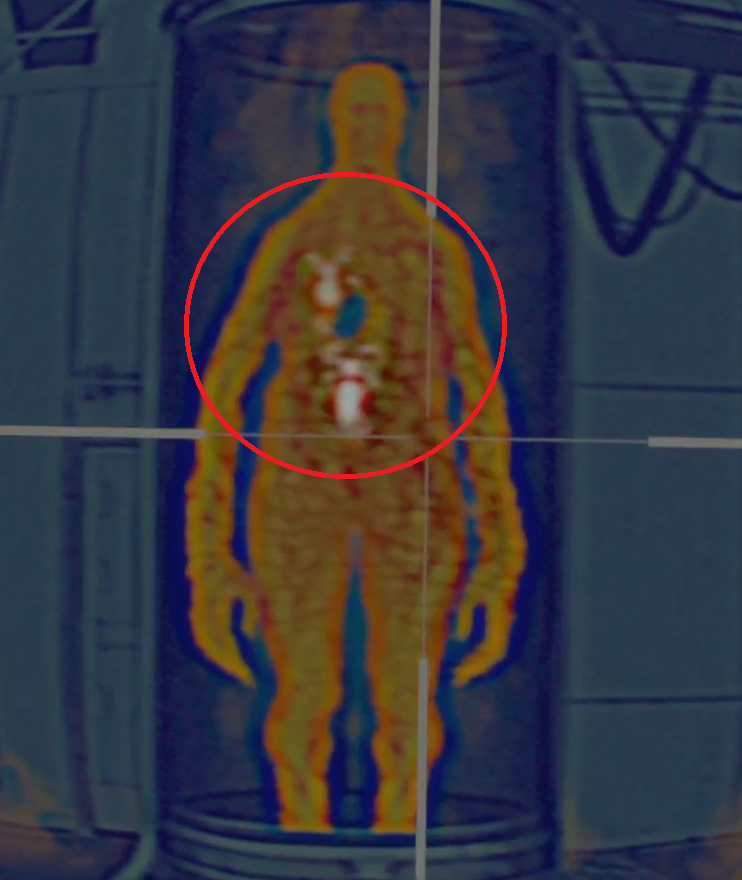
You don’t need the biosensor scope to kill this guy but it will make your life so much easier! If you have the scope, line up your first shot from the right side so you can hit two of the plagas at once (depending on your difficulty). That’ll make one less shot you need to take afer the first one.
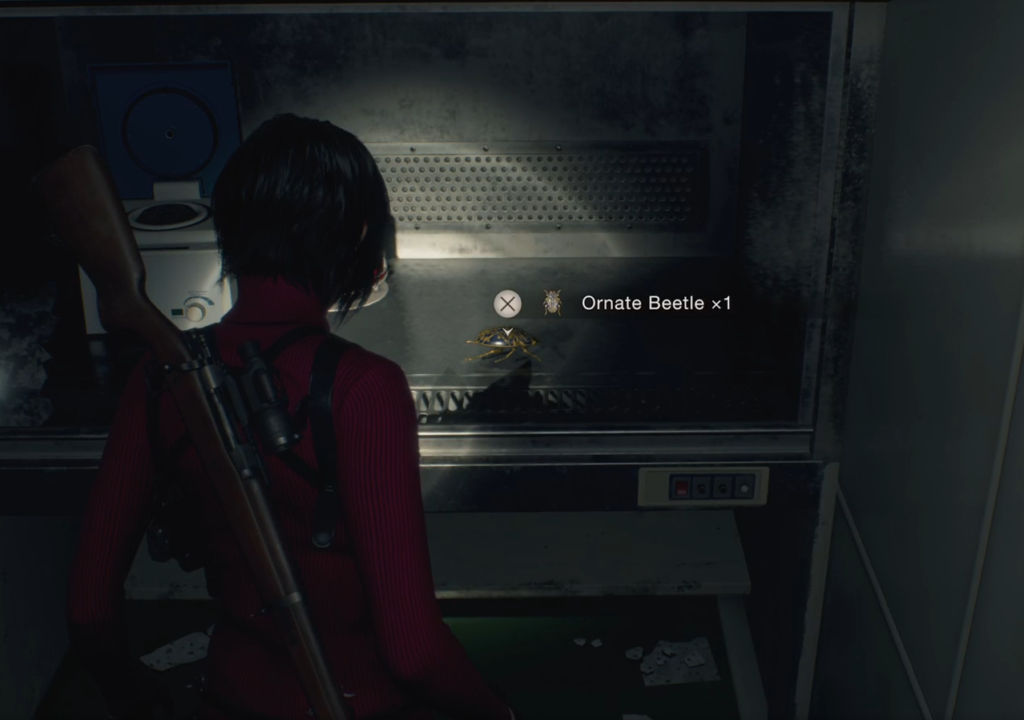
The second one isn’t in a regenerator, but it’s being guarded by one, so either lure him out to get at the beetle or take him out. Then smash the glass to get to it.

Sell both of them to the merchant to complete the request.


Bug Buster #2

This is in Chapter 6 on the Defensive Line. The request flier for this one can be found by the drop down into the Defensive Line, and it’s worth 9 spinels.
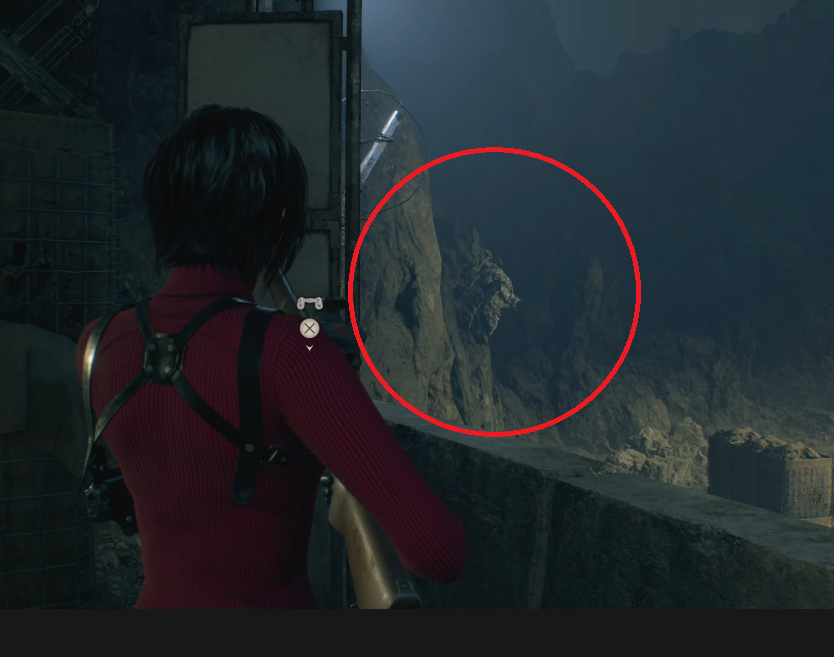
The first bug is just inside the Defensive Line on the left.
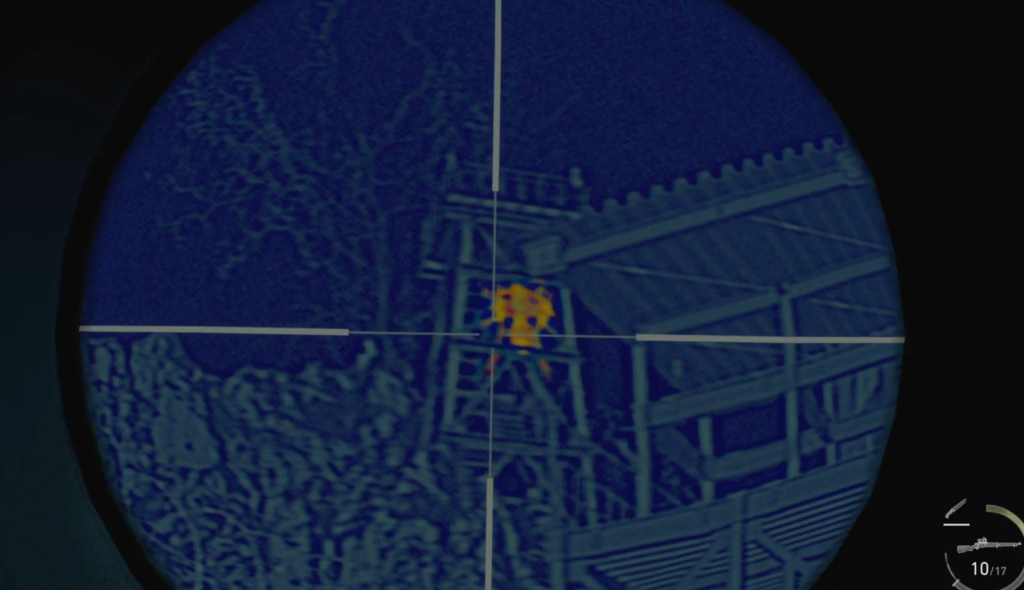
The second Novi is up on the tower on the right about midway through. You don’t need the biosensor scope to see it, but it helps.
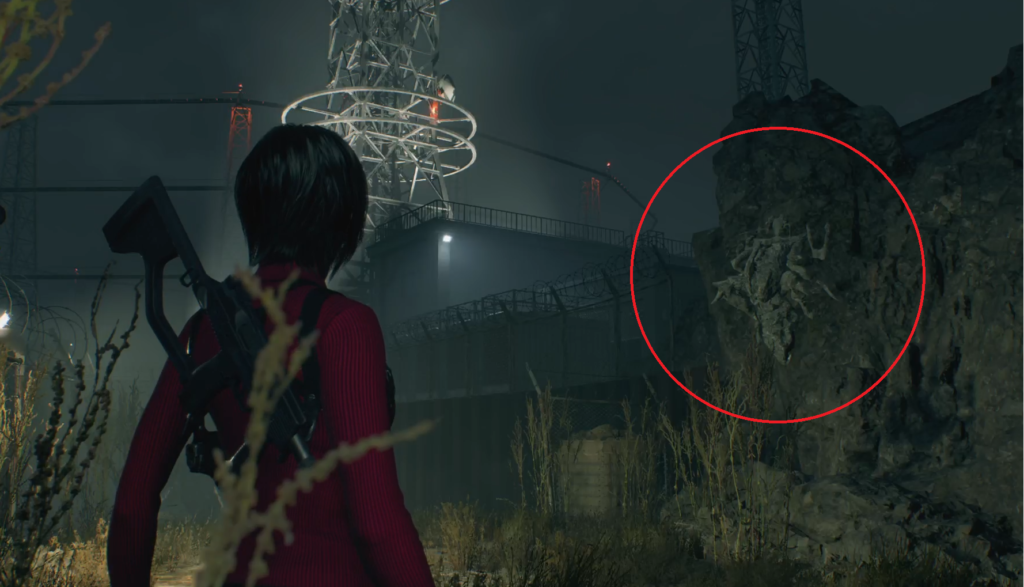
The last Novi is in the back behind the third laser bunker.

RE4R Puzzle: Clockwork Catellan Windup Locations

There are 16 Clockwork guys in the game. Finding and shooting them all will get you the Revolution Wind-Up – Destroy all Clockwork Castellans Trophy.

  1. Chapter 1 – Lakeside Settlement – Southwestern house. You can get this in either chapter 1 or when you return in chapter 4.
  2. Chapter 2 – Village Chief’s House – Go through the Emblem door at the Abandoned Factory, up the stairs, building on the left.  This is the same building as the note asking you to destroy them.
  3. Chapter 3 – Merchant HQ – In the Quarry area, it’s on the Merchant dock.  Stand on the covered area and look on the top of the crates.
  4. Chapter 4 – Lakeside Settlement – You need the Insignia Key for this one which is why you can’t get it in chapter 1. In the Forest Altar, it’s behind the gate up in the yard.  Go to the back gate and look through.
  5. Chapter 5 – Village Chief’s Manor – In the attic on the left behind the left crate. You need a partner for this which is why you can’t get this one in chapter 2.
  6. Chapter 6 – Entry into Checkpoint – Just before the gate into the larger east area, look right at a bonfire.
  7. Chapter 7 – Castle Treasury – First upstairs room after climbing up from the dungeon.  He’s on a top shelf in the middle of the room.
  8. Chapter 8 – Battlement #1 – Go to #2, up to the top level and then backtrack. Take the outside ladder up to the top of #1.
  9. Chapter 9 – Courtyard Under the NW stairs – There’s first aid spray on the table, then this is to the right by the pallet.
  10. Chapter 10 – Depths Tunnels – Tunnel grate across from the merchant.
  11. Chapter 11 – Stopover – Just after the first cart ride there’s a room upstairs. This guy is on the top of the south wall where there’s no ceiling.
  12. Chapter 12 – Clock Tower – He’s on the entrance level, back on the left.
  13. Chapter 13 – Inside above the Wharf – When you get to the wharf, go in, up the ladder, up the ramp, and in the new area and it’s down east of the treasure chest, under the left side of the 18 wheeler.
  14. Chapter 14 – Above the campsite – From the Amber storeroom, go right in the tunnels and then into the office area.  He’s on the lockers.
  15. Chapter 15 – Specimen Storage – Room north of the first wheel room.  He’s in the rafters.
  16. Chapter 16 – Escape Sequence – After Saddler, when you’re inside noting all of the enemies dying you’ll see a small bulldozer. He’s above that to the left.
read more

RE4R Puzzle: 5 Cubic Device Use Locations

In chapter 9, in the armory of the Grand Hall, you can pick up a Cubic Device in a Treasure Chest. This device can be used in 5 different places that I’ve found so far, but the key isn’t sellable yet, so I’m assuming there’s more. But this will get you started! I will update this post as I find more, so check back. 🙂

  1. Merchant Room in the Grand Hall – Butterfly Lamp
  2. Audience Chamber – Justitia Statue
  3. Up the stairs that Ashley cranks down in the library – CQBR Assault Rifle
  4. Emblem Room (where Ashley put the emblem to open the gate to free Leon) – Golden Lynx
  5. Throne Room – This cannot be gotten until chapter 12, after you’ve climbed back up.

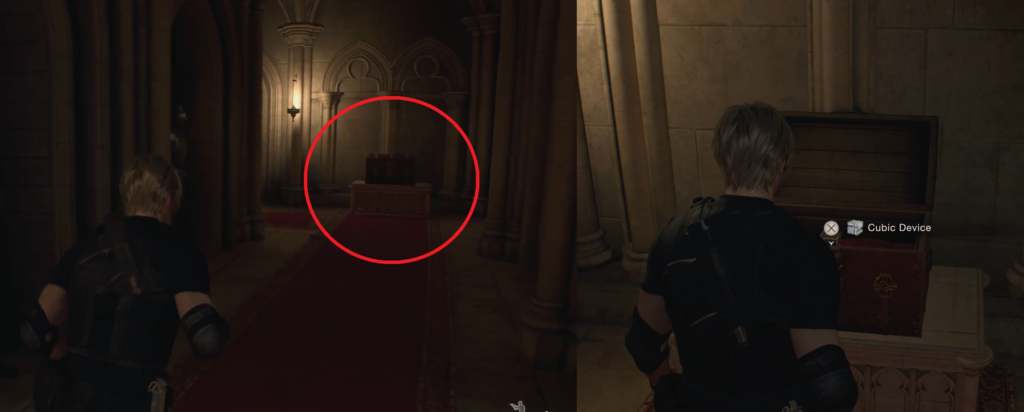
The cubic device can be found in a treasure chest as you exit the Armory in the Grand Hall.

read more

RE4R Puzzle: Village Chief’s Manor

In order to get into the bedroom upstairs, you need to open the cabinet in the back hall downstairs. To get the cabinet open, you need to have read the Iluminados 4:3 verse that is found upstairs on the table. That will tell you that the cabinet lock is crops, pig, and baby.

That will get you the marble that you need to put in the door upstairs. I found it easiest to turn it to find the “sharpest” edges to get it to look like the church insignia. Once you can sort of pick out the shape of the lower legs, then you can just turn it right-side up.

See below the screenshots for a video.

read more

RE4R: 5 Wayshrine Locations

I have found 5 Wayshrine Locations in the game.

The Key can be found at the end of the Mural Cave, just before the boat.

  1. The Farm – Between the windmill and the east two story building. Antique Pipe.
  2. Lakeside Settlement – Left of the house where you meet Luis. Pearl Bangle.
  3. Quarry – on the path between the start of the quarry and the Merchant Hideout. Butterfly Lamp.
  4. Lower Quarry – when you have free reign of the boat in chapter 4, you can go south past the Merchant’s dock to find this. Splendid Bangle.
  5. Checkpoint – in Chapter 6, on your way out of the village, this is in the same area as the 2 chainsaw ladies. Elegant Headdress.
read more

RE4R: Chapter 4’s Hexagonal Puzzle

This is a video that shows HOW to solve the puzzle in case you were like me and just fiddled with it for a bunch at first, not realizing you can solve it in just a couple of steps if you do it right from the start, and now it’s all messed up and you don’t know what to do next and you can’t reset it and you saved waaaaaaaaaay too long ago to want to reload, but you want that treasure!!

read more